 App Developer

1 - First Step befor Start
Check that your app is ready and compiles without errors in debug mode. Also, make sure that R8 is enabled and use the Android Profiler to optimize your app’s performance for the release version.
2 - Generate the AAB File for Your App in Android Studio
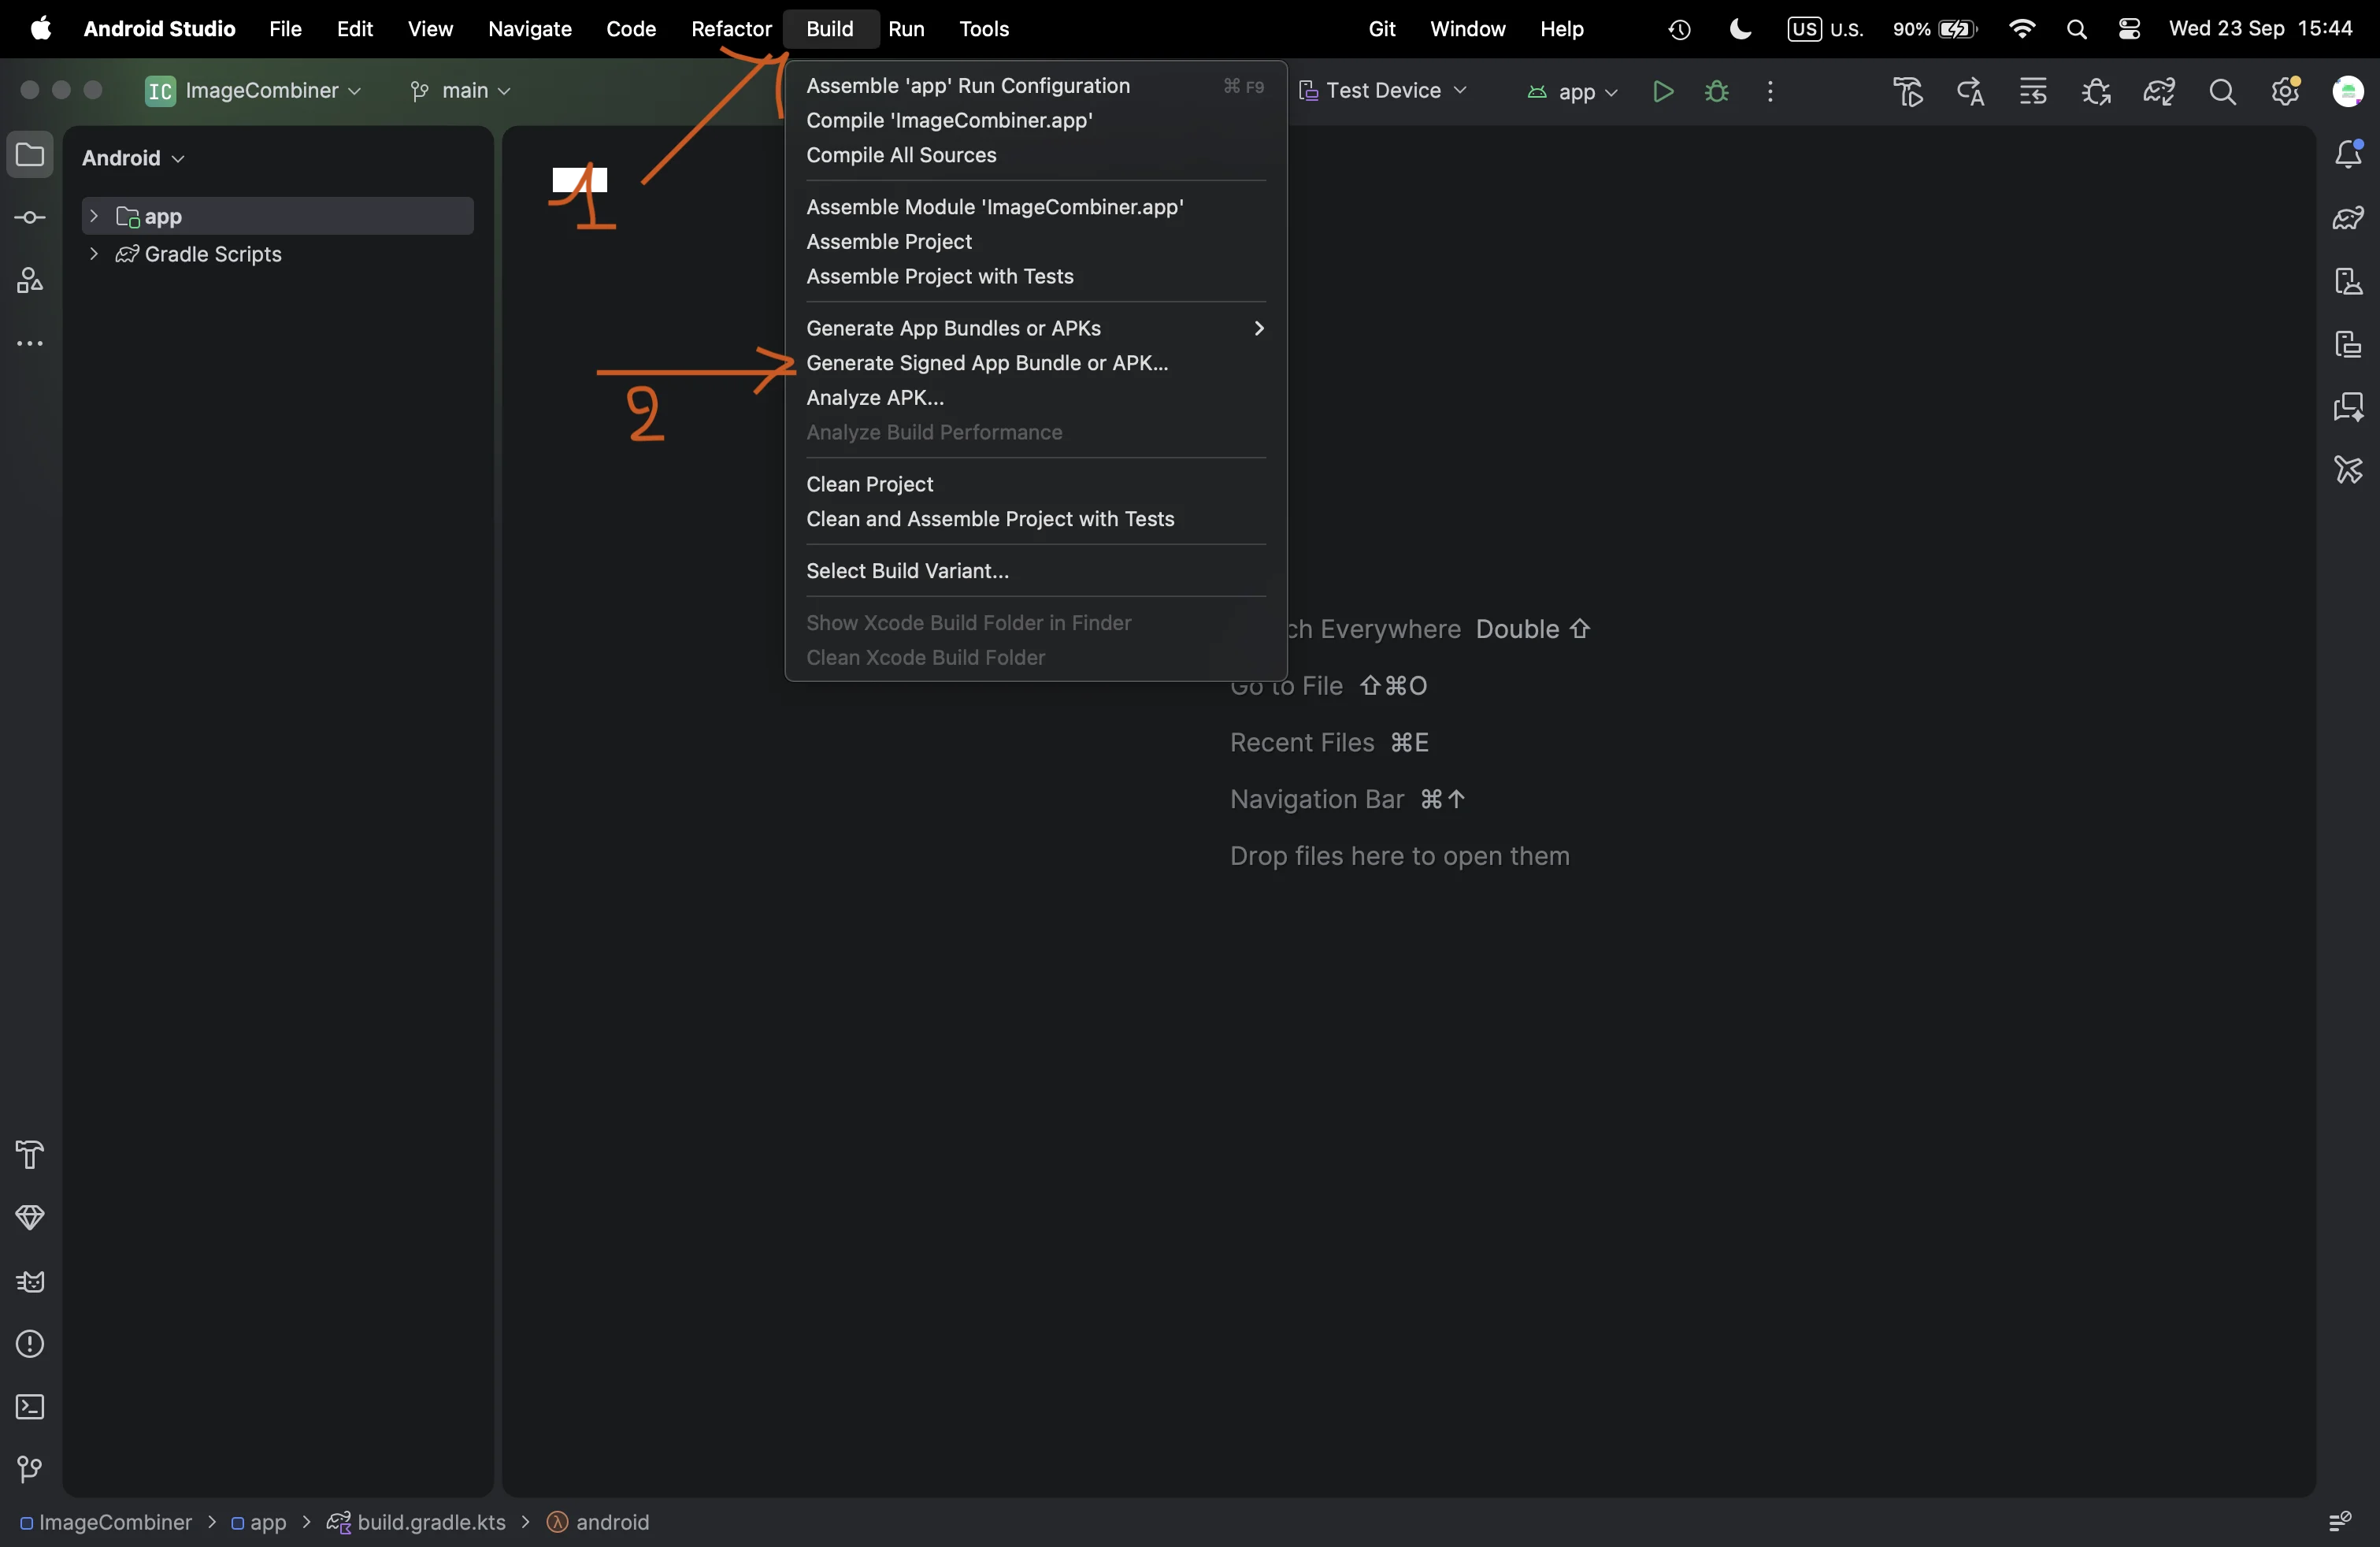
Open your project in Android Studio and click Build in the top menu bar (1). A long list of options will drop down. Look for "Generate Signed App Bundle or APK..." and click it (2). Be careful not to pick "Generate App Bundles or APKs" just above it, because that one builds an unsigned bundle, and Google Play won't accept an unsigned file.
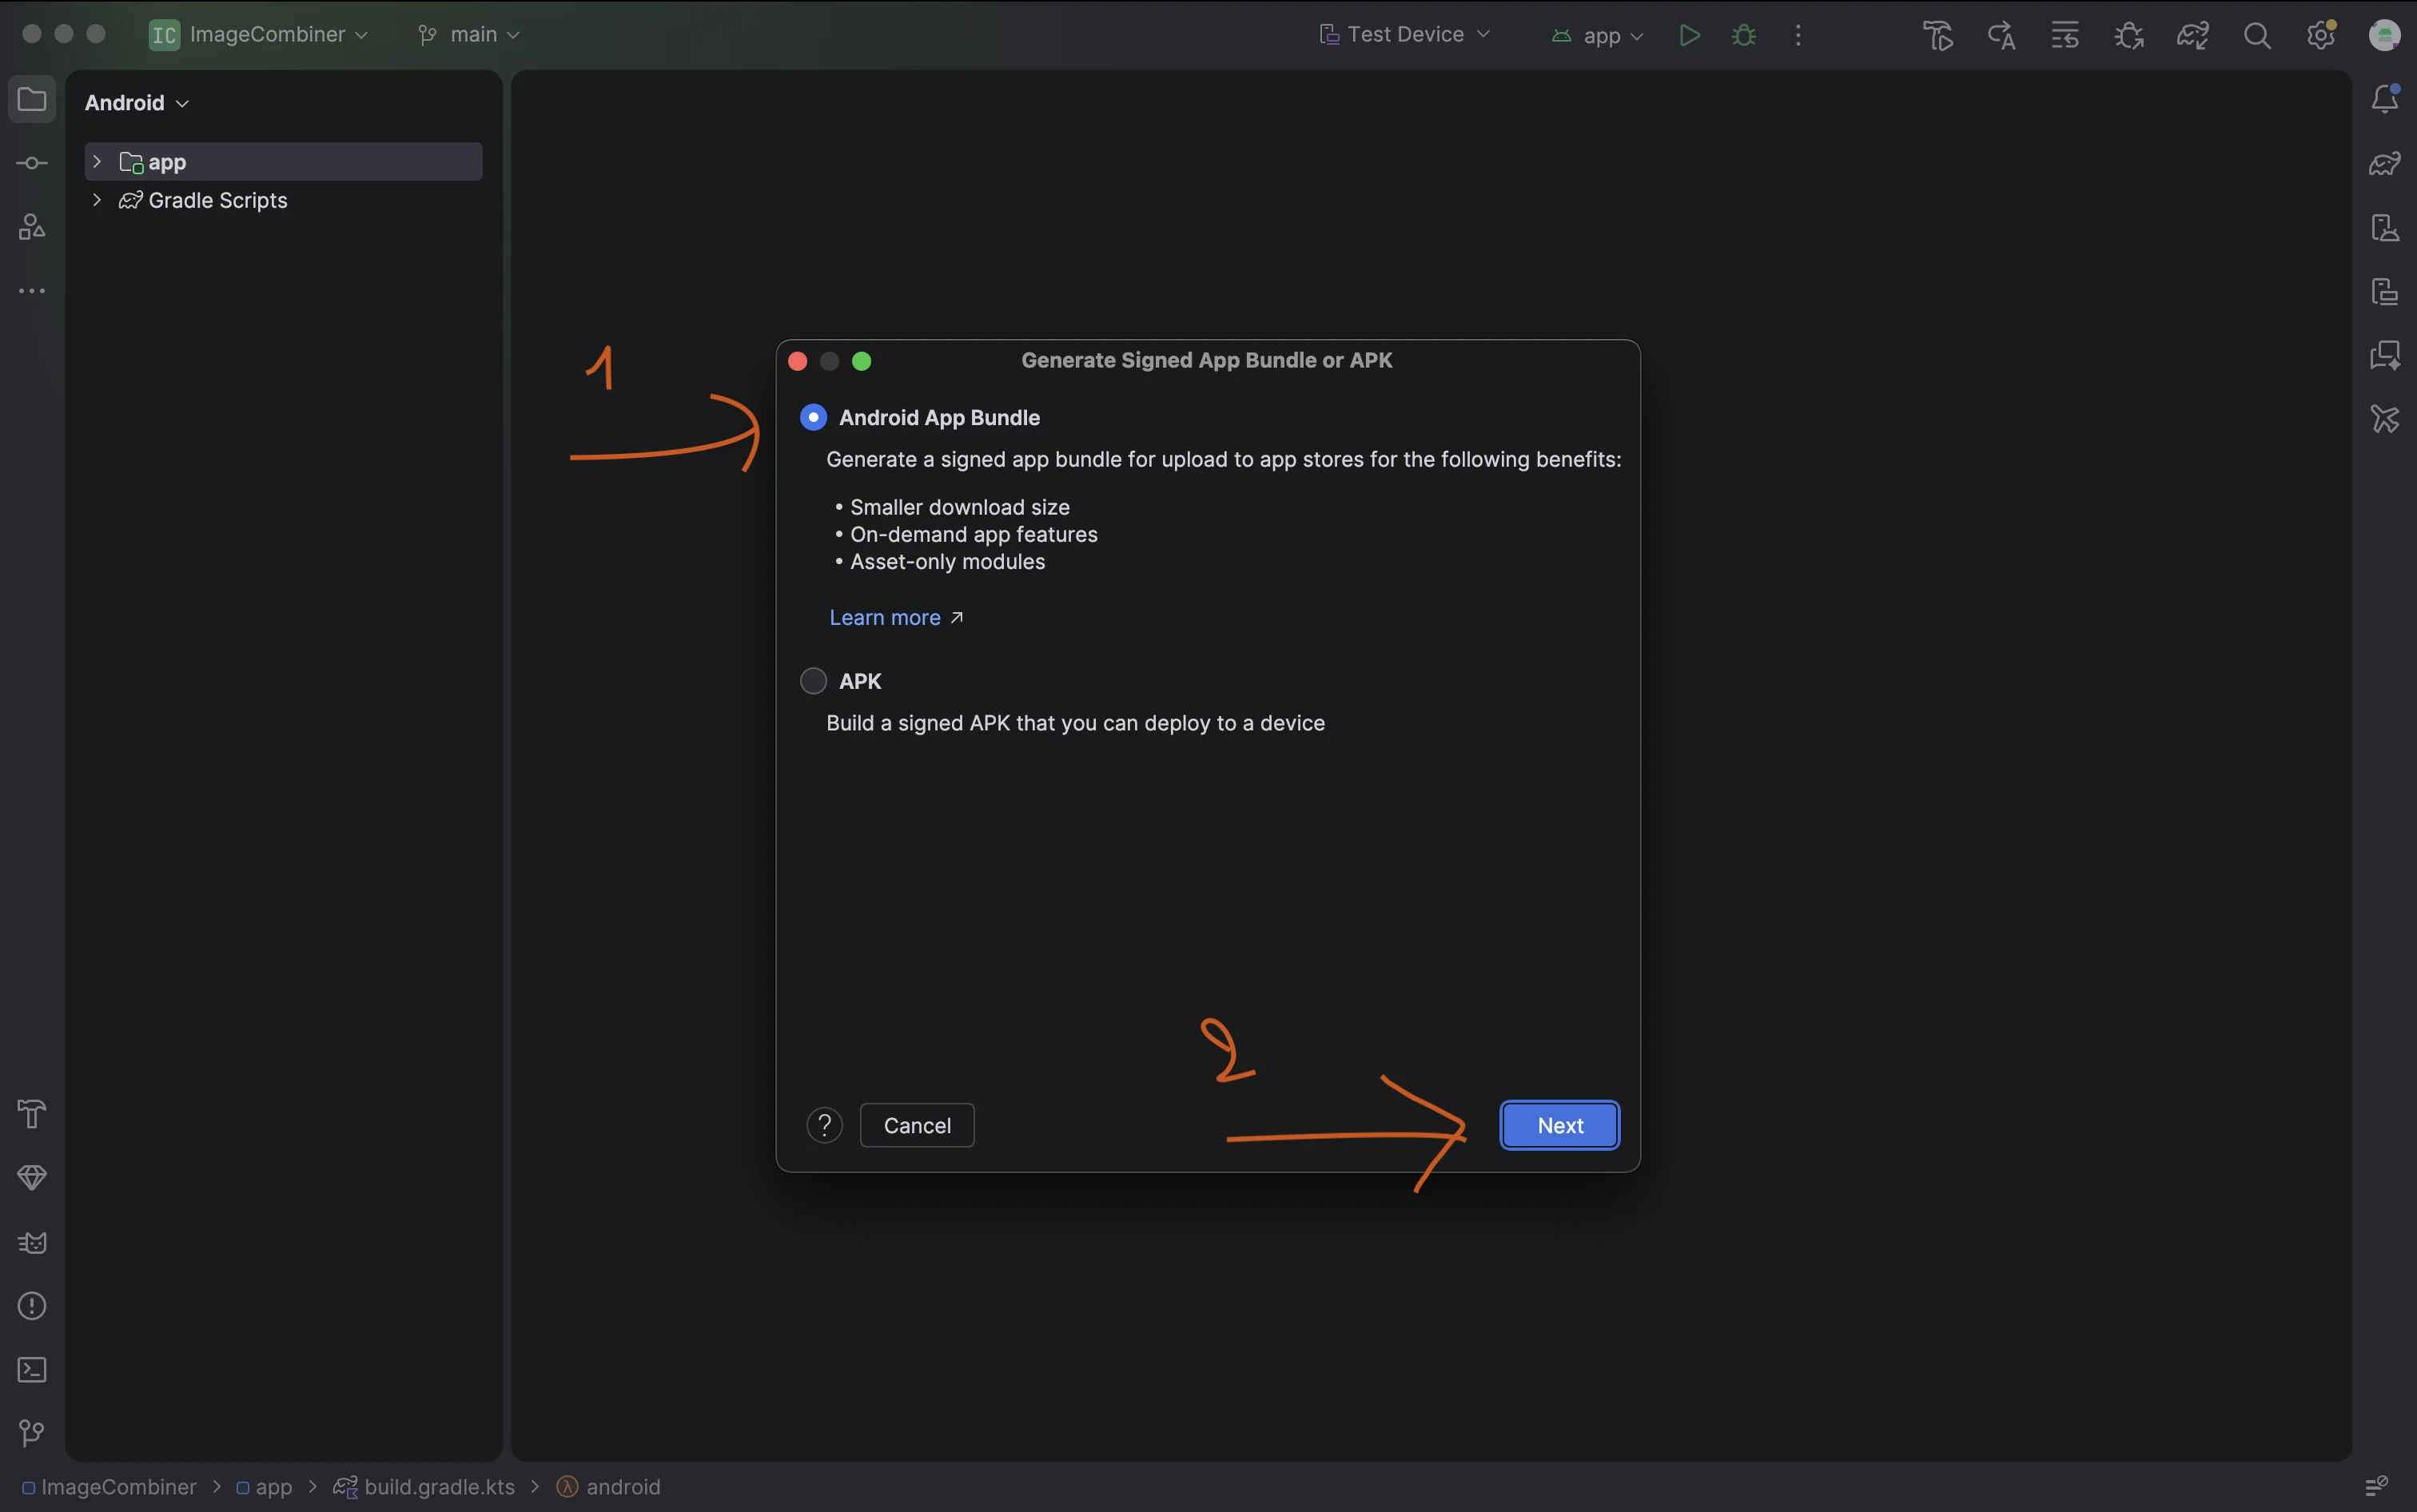
A small window opens and asks what you want to build. Select "Android App Bundle" (1). This is the AAB format, and it comes with real benefits: a smaller download size for your users, on-demand features, and asset-only modules. The APK option is still useful when you just want to install the app on a device yourself, but for the Play Store you want the bundle. Then click Next (2).
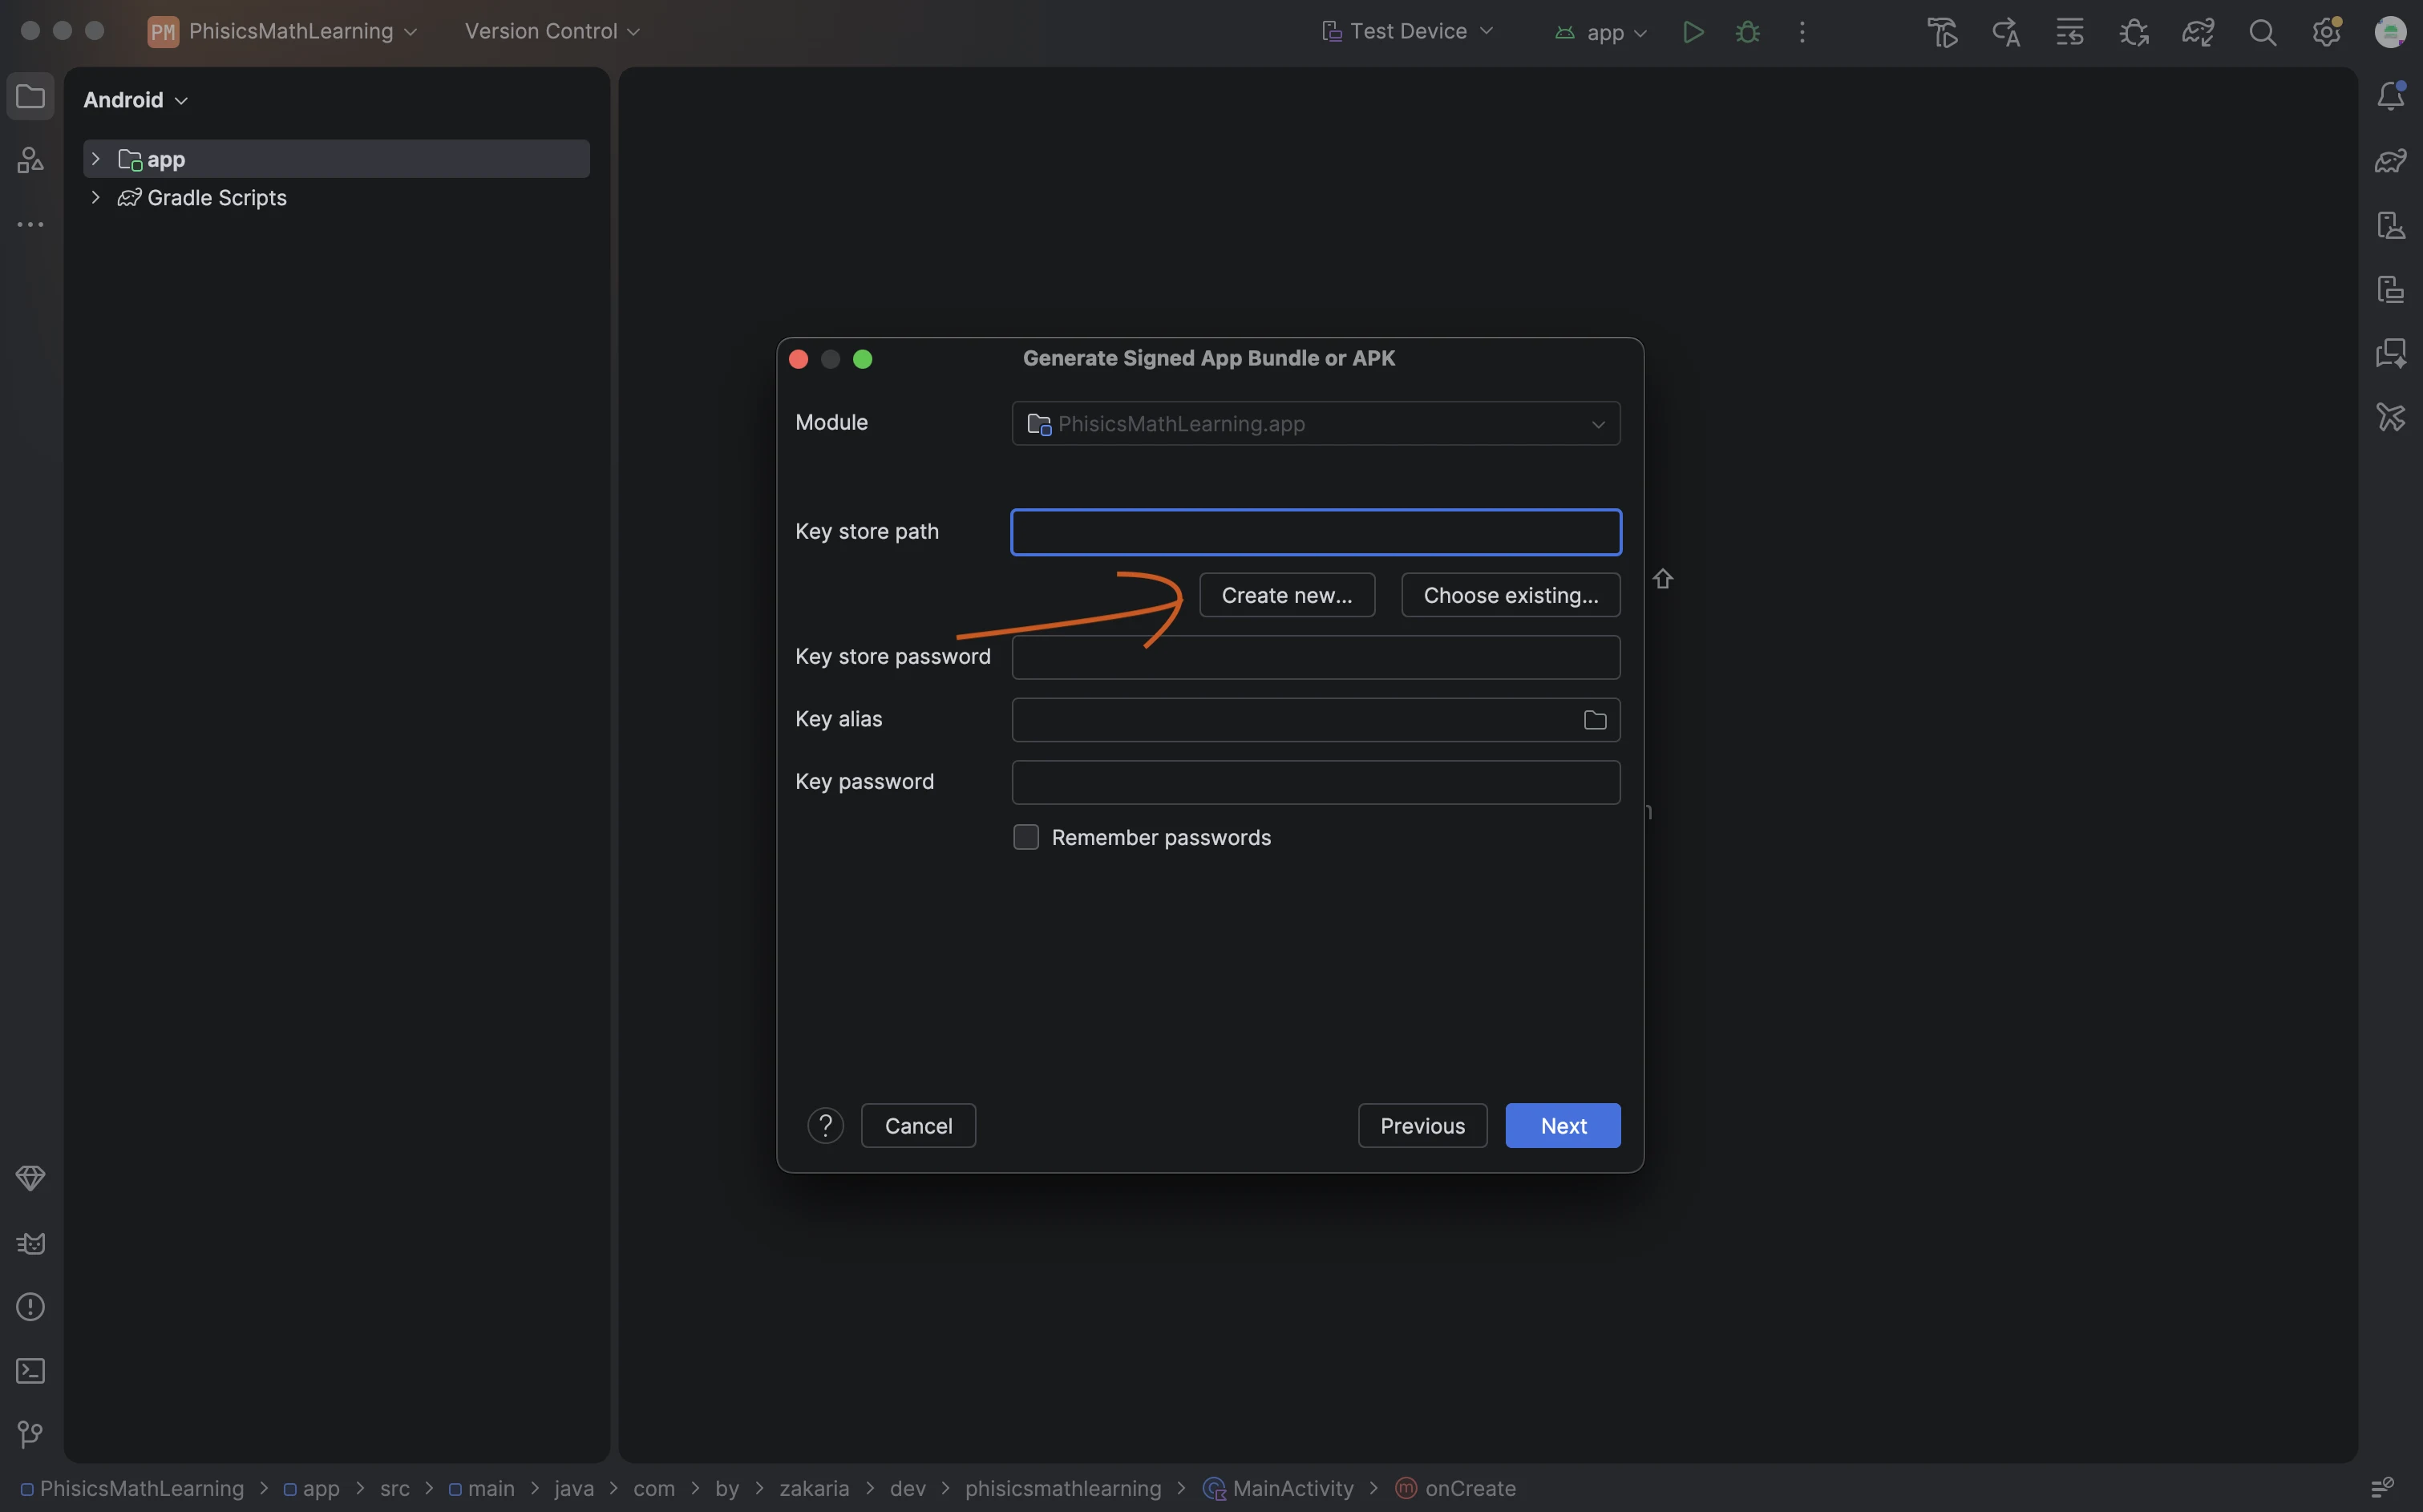
Now Android Studio needs a key to sign your app bundle. Signing proves to Google Play that the app really comes from you. If this is your first release, you don't have a keystore yet, so click "Create new...". If you already made one for an earlier version of this app, click "Choose existing..." instead and select that file. Always use the same key for every update of the same app.
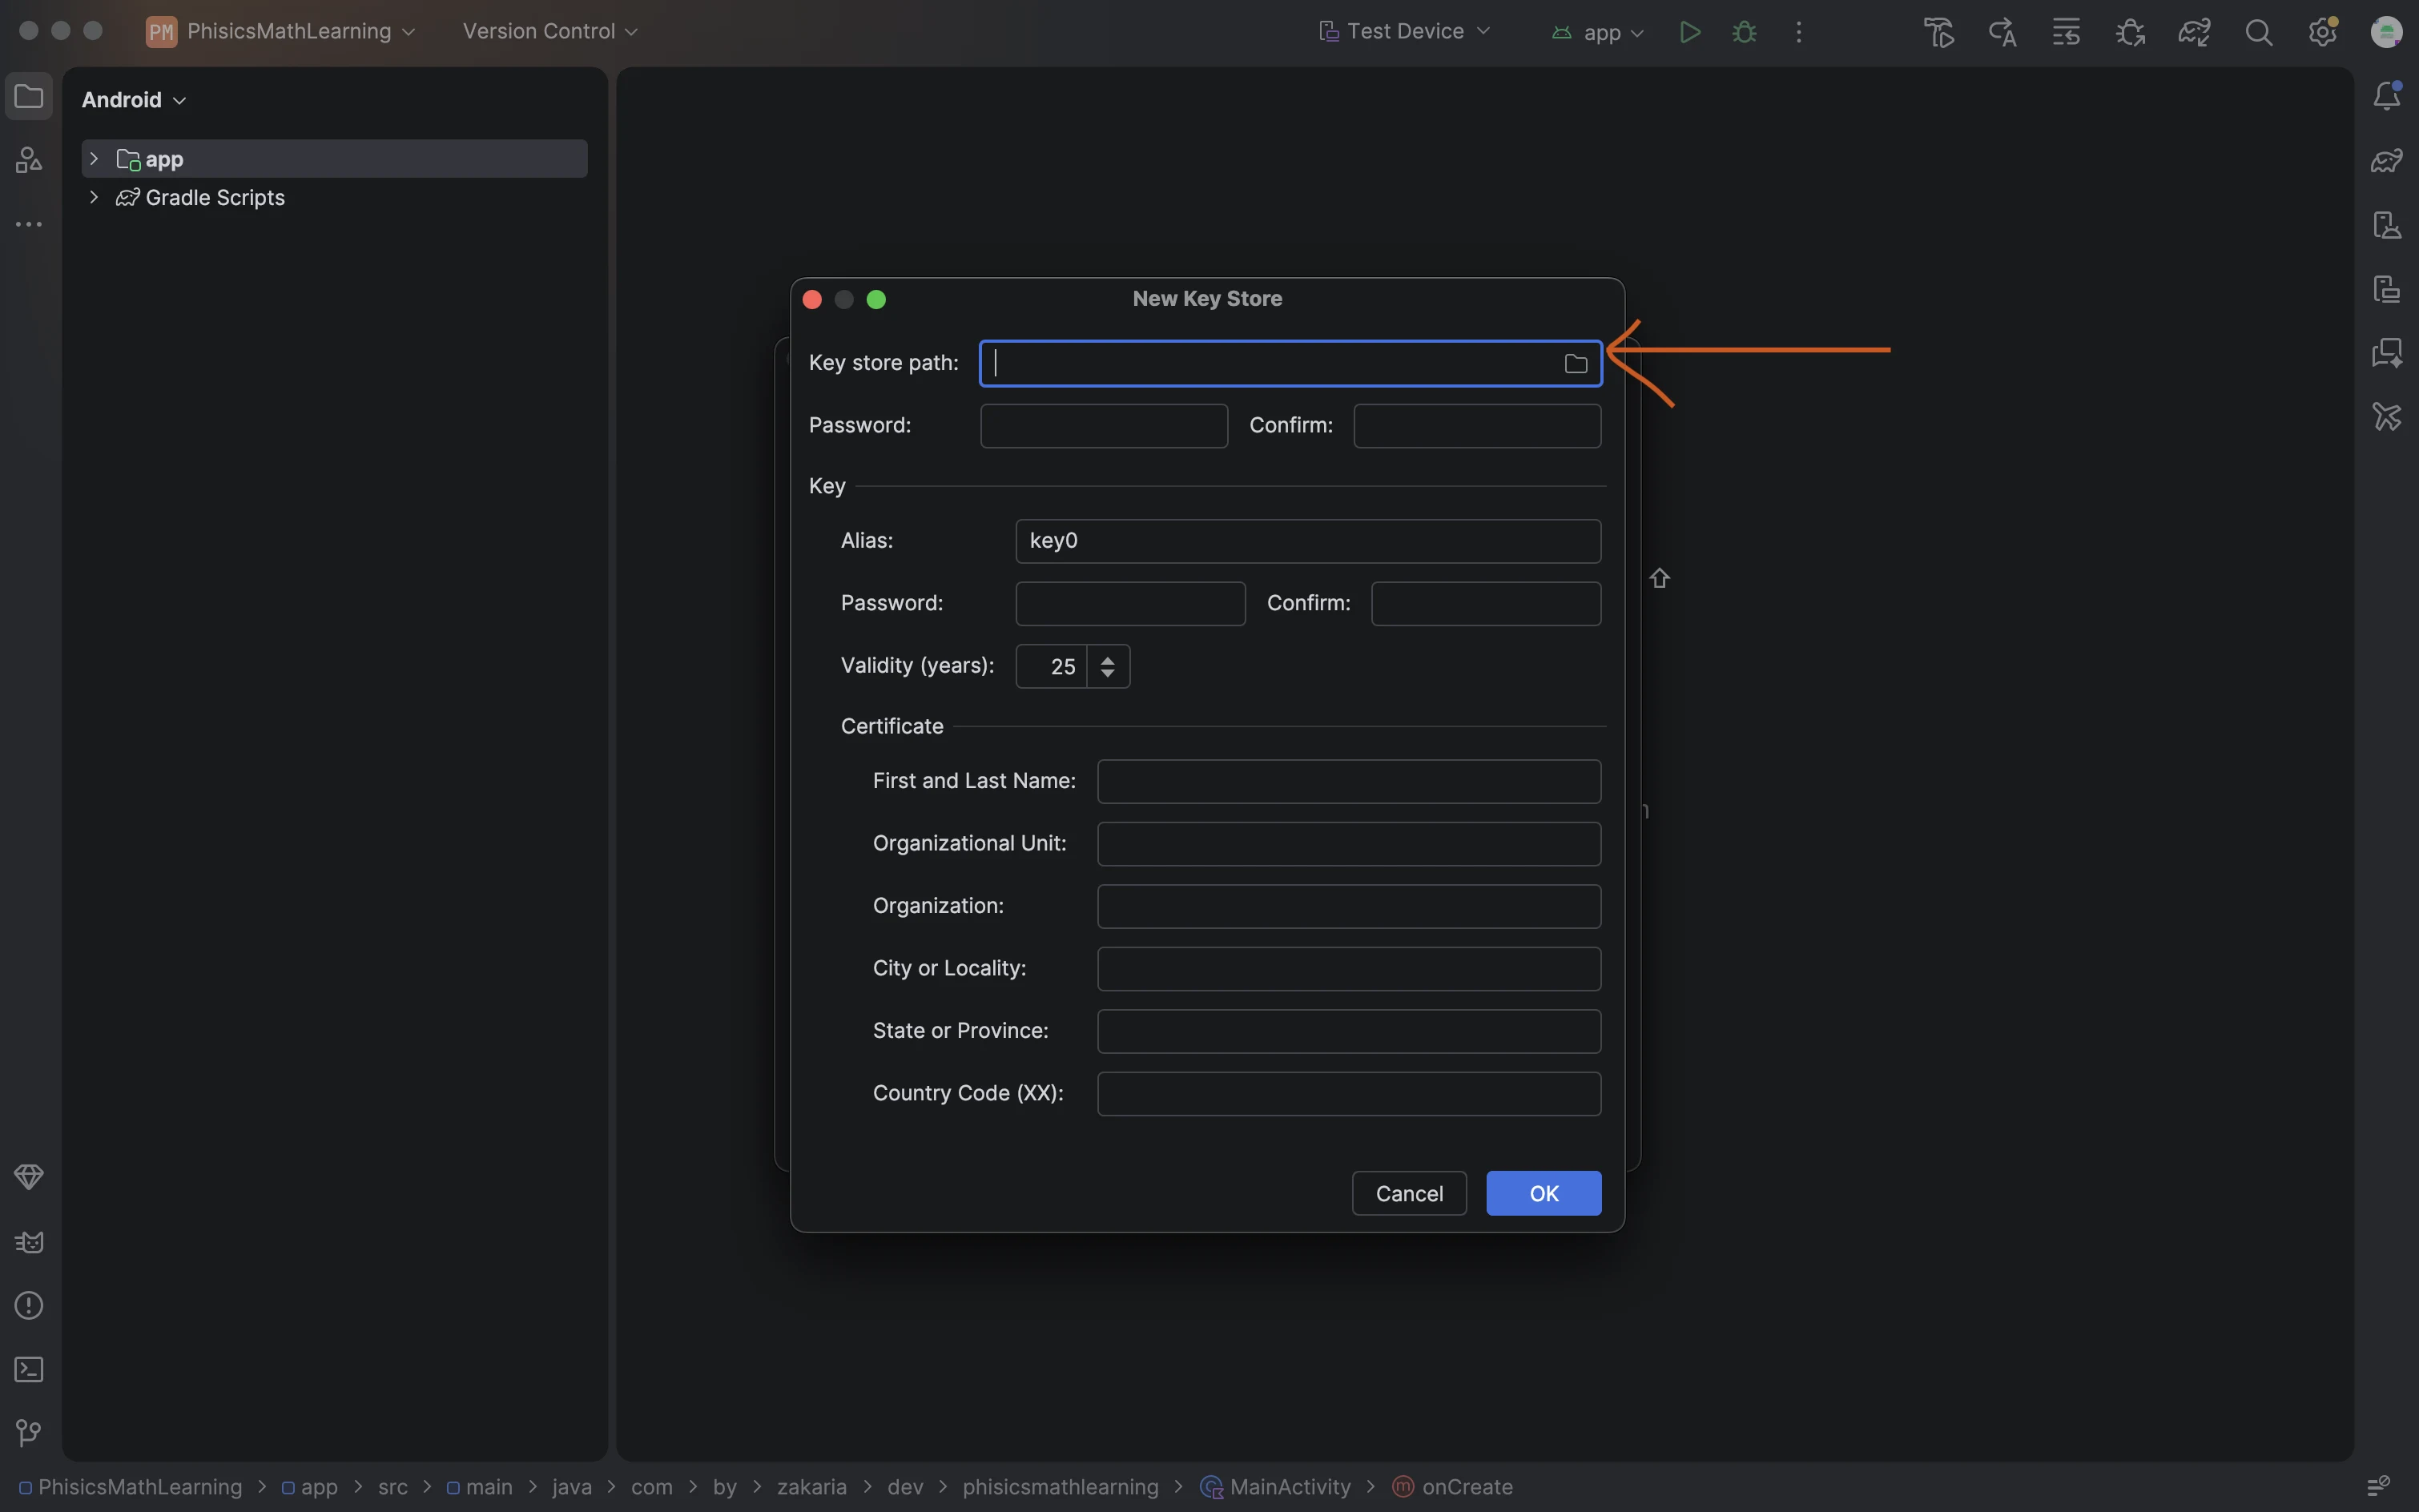
The "New Key Store" window appears. It has fields for the keystore path, passwords, the key alias, and your certificate details. Start with the top field, "Key store path". Click the small folder icon on the right side of that field to choose where the keystore file will be saved.
A file browser opens. In the "Save As" field, type a name for your keystore and make sure it ends with .jks, for example my_first_key.jks (1). Choose a folder you'll remember, then click Save (2).
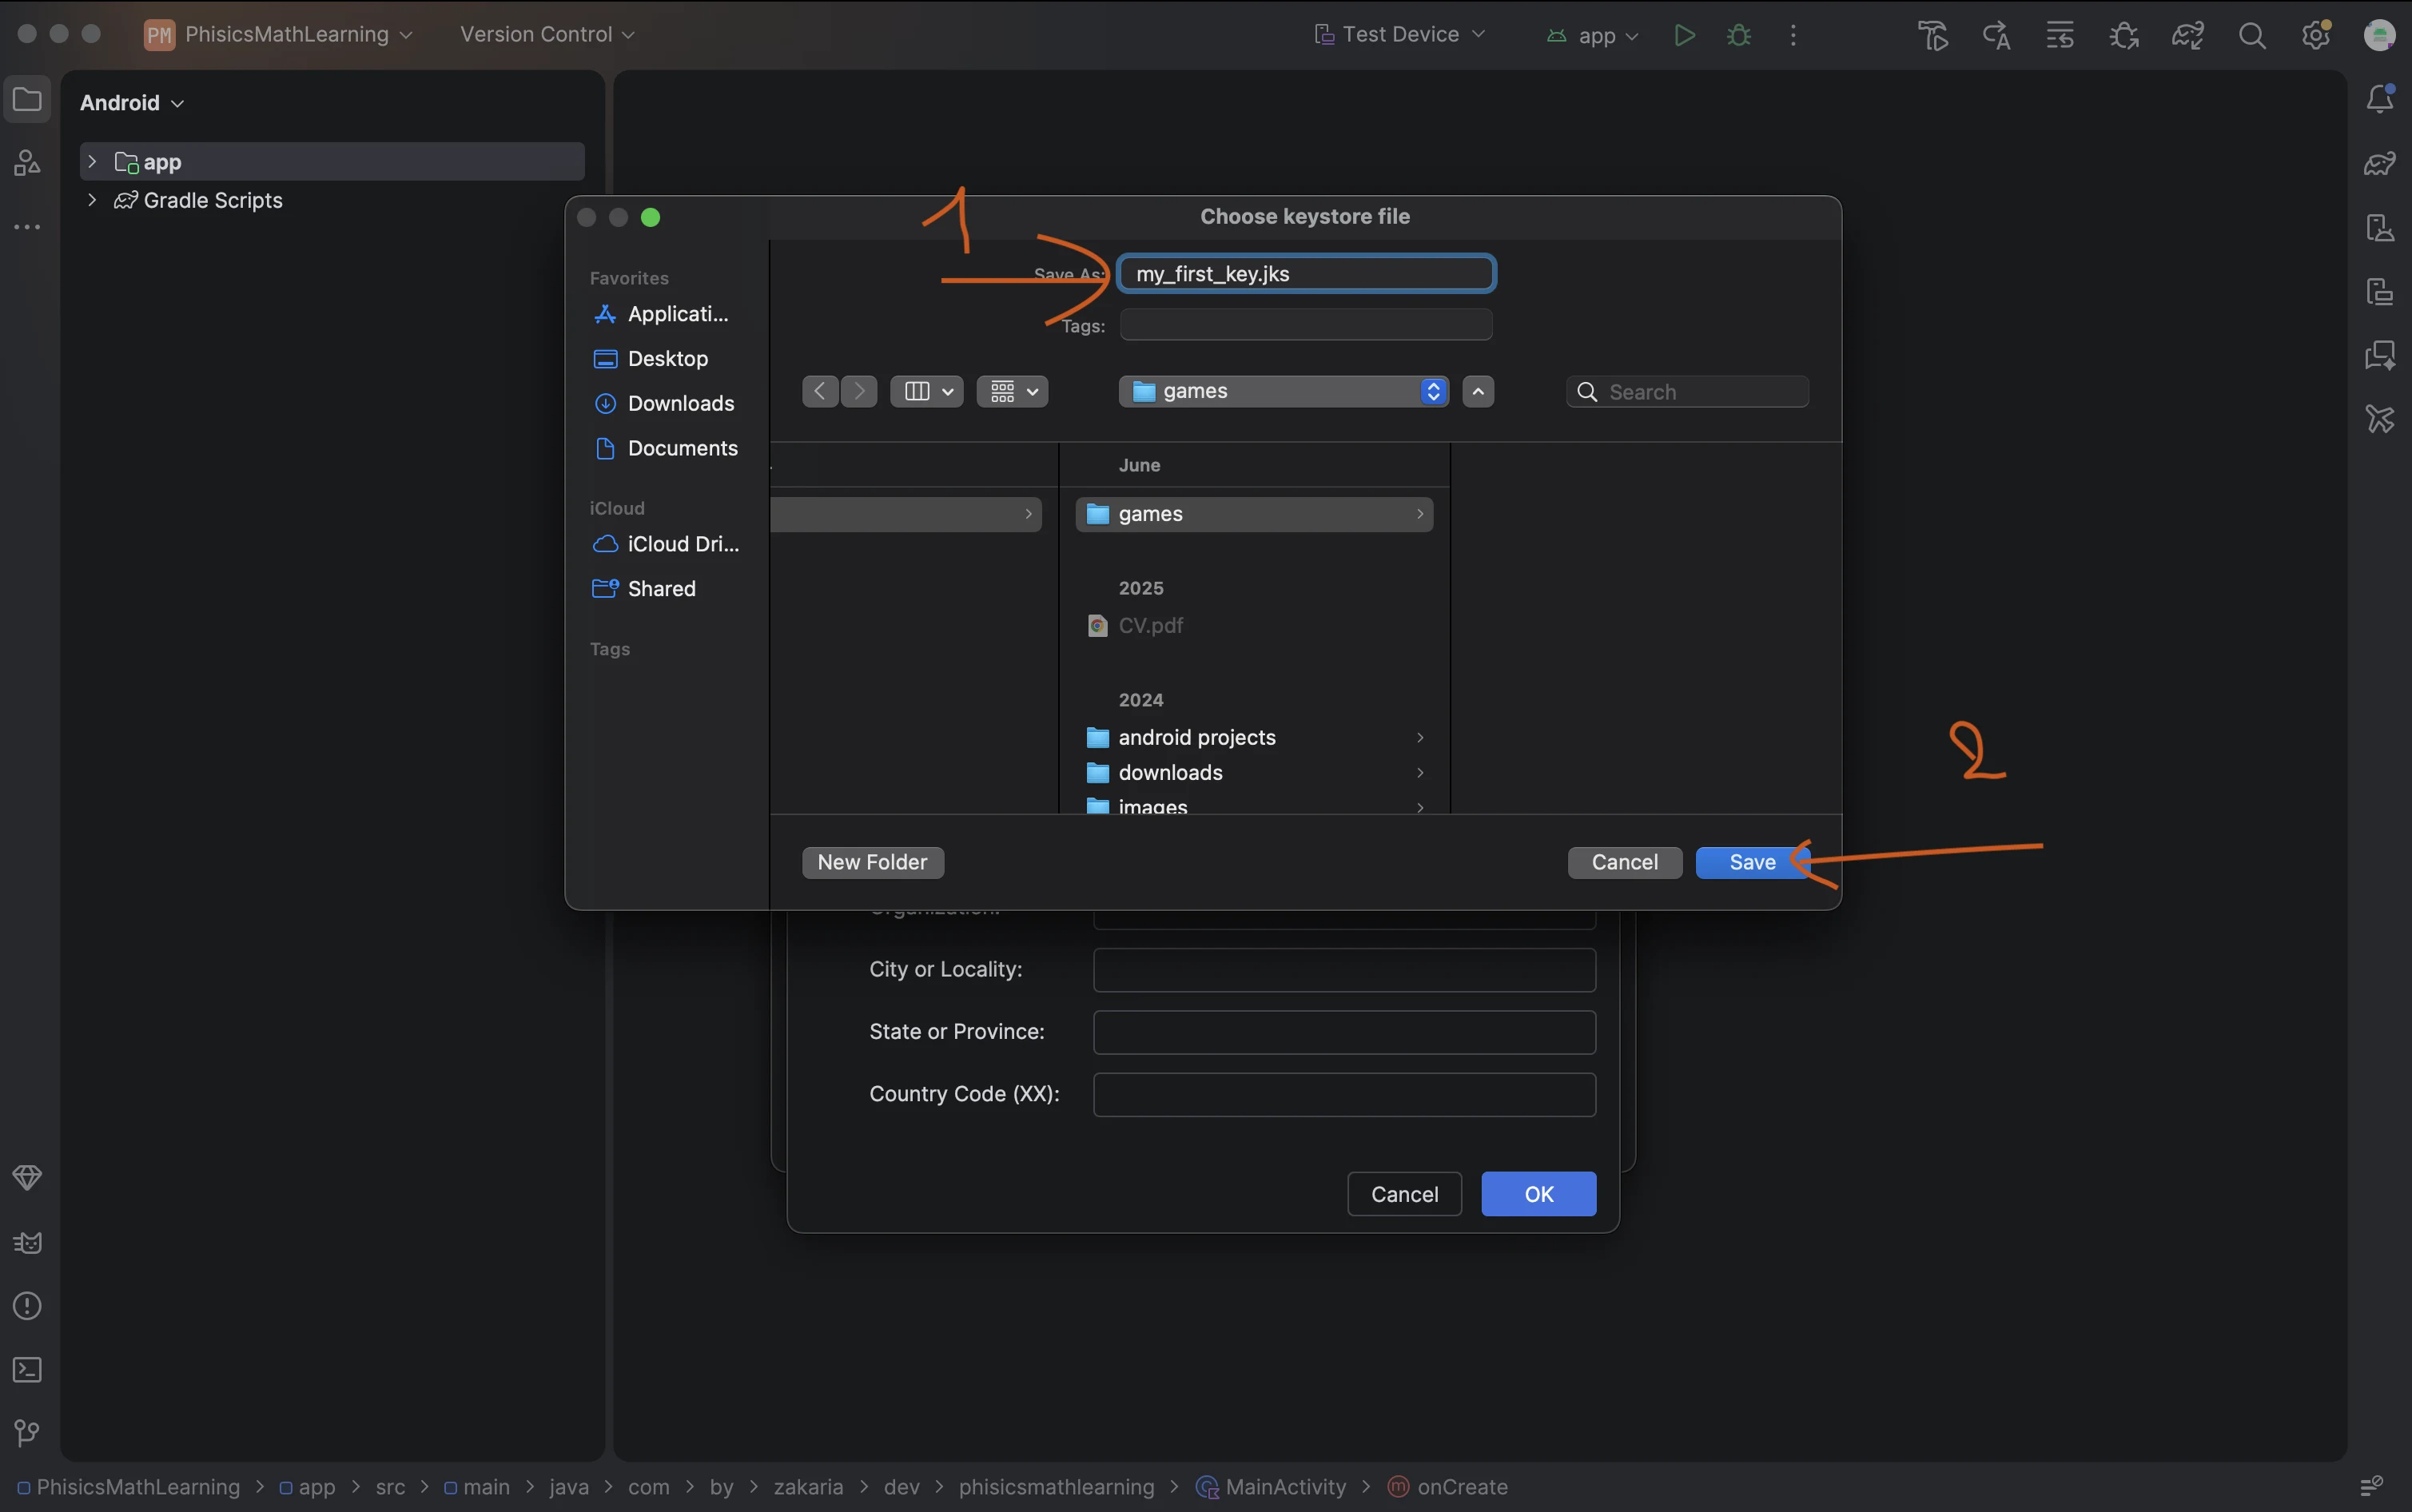
Tip: keep this file somewhere safe and back it up (a USB drive or a private cloud folder works well). If you lose the keystore or forget its password, you won't be able to sign updates for your app in the usual way.
The path of your new .jks file is now filled in at the top. Fill in the rest of the form in this order
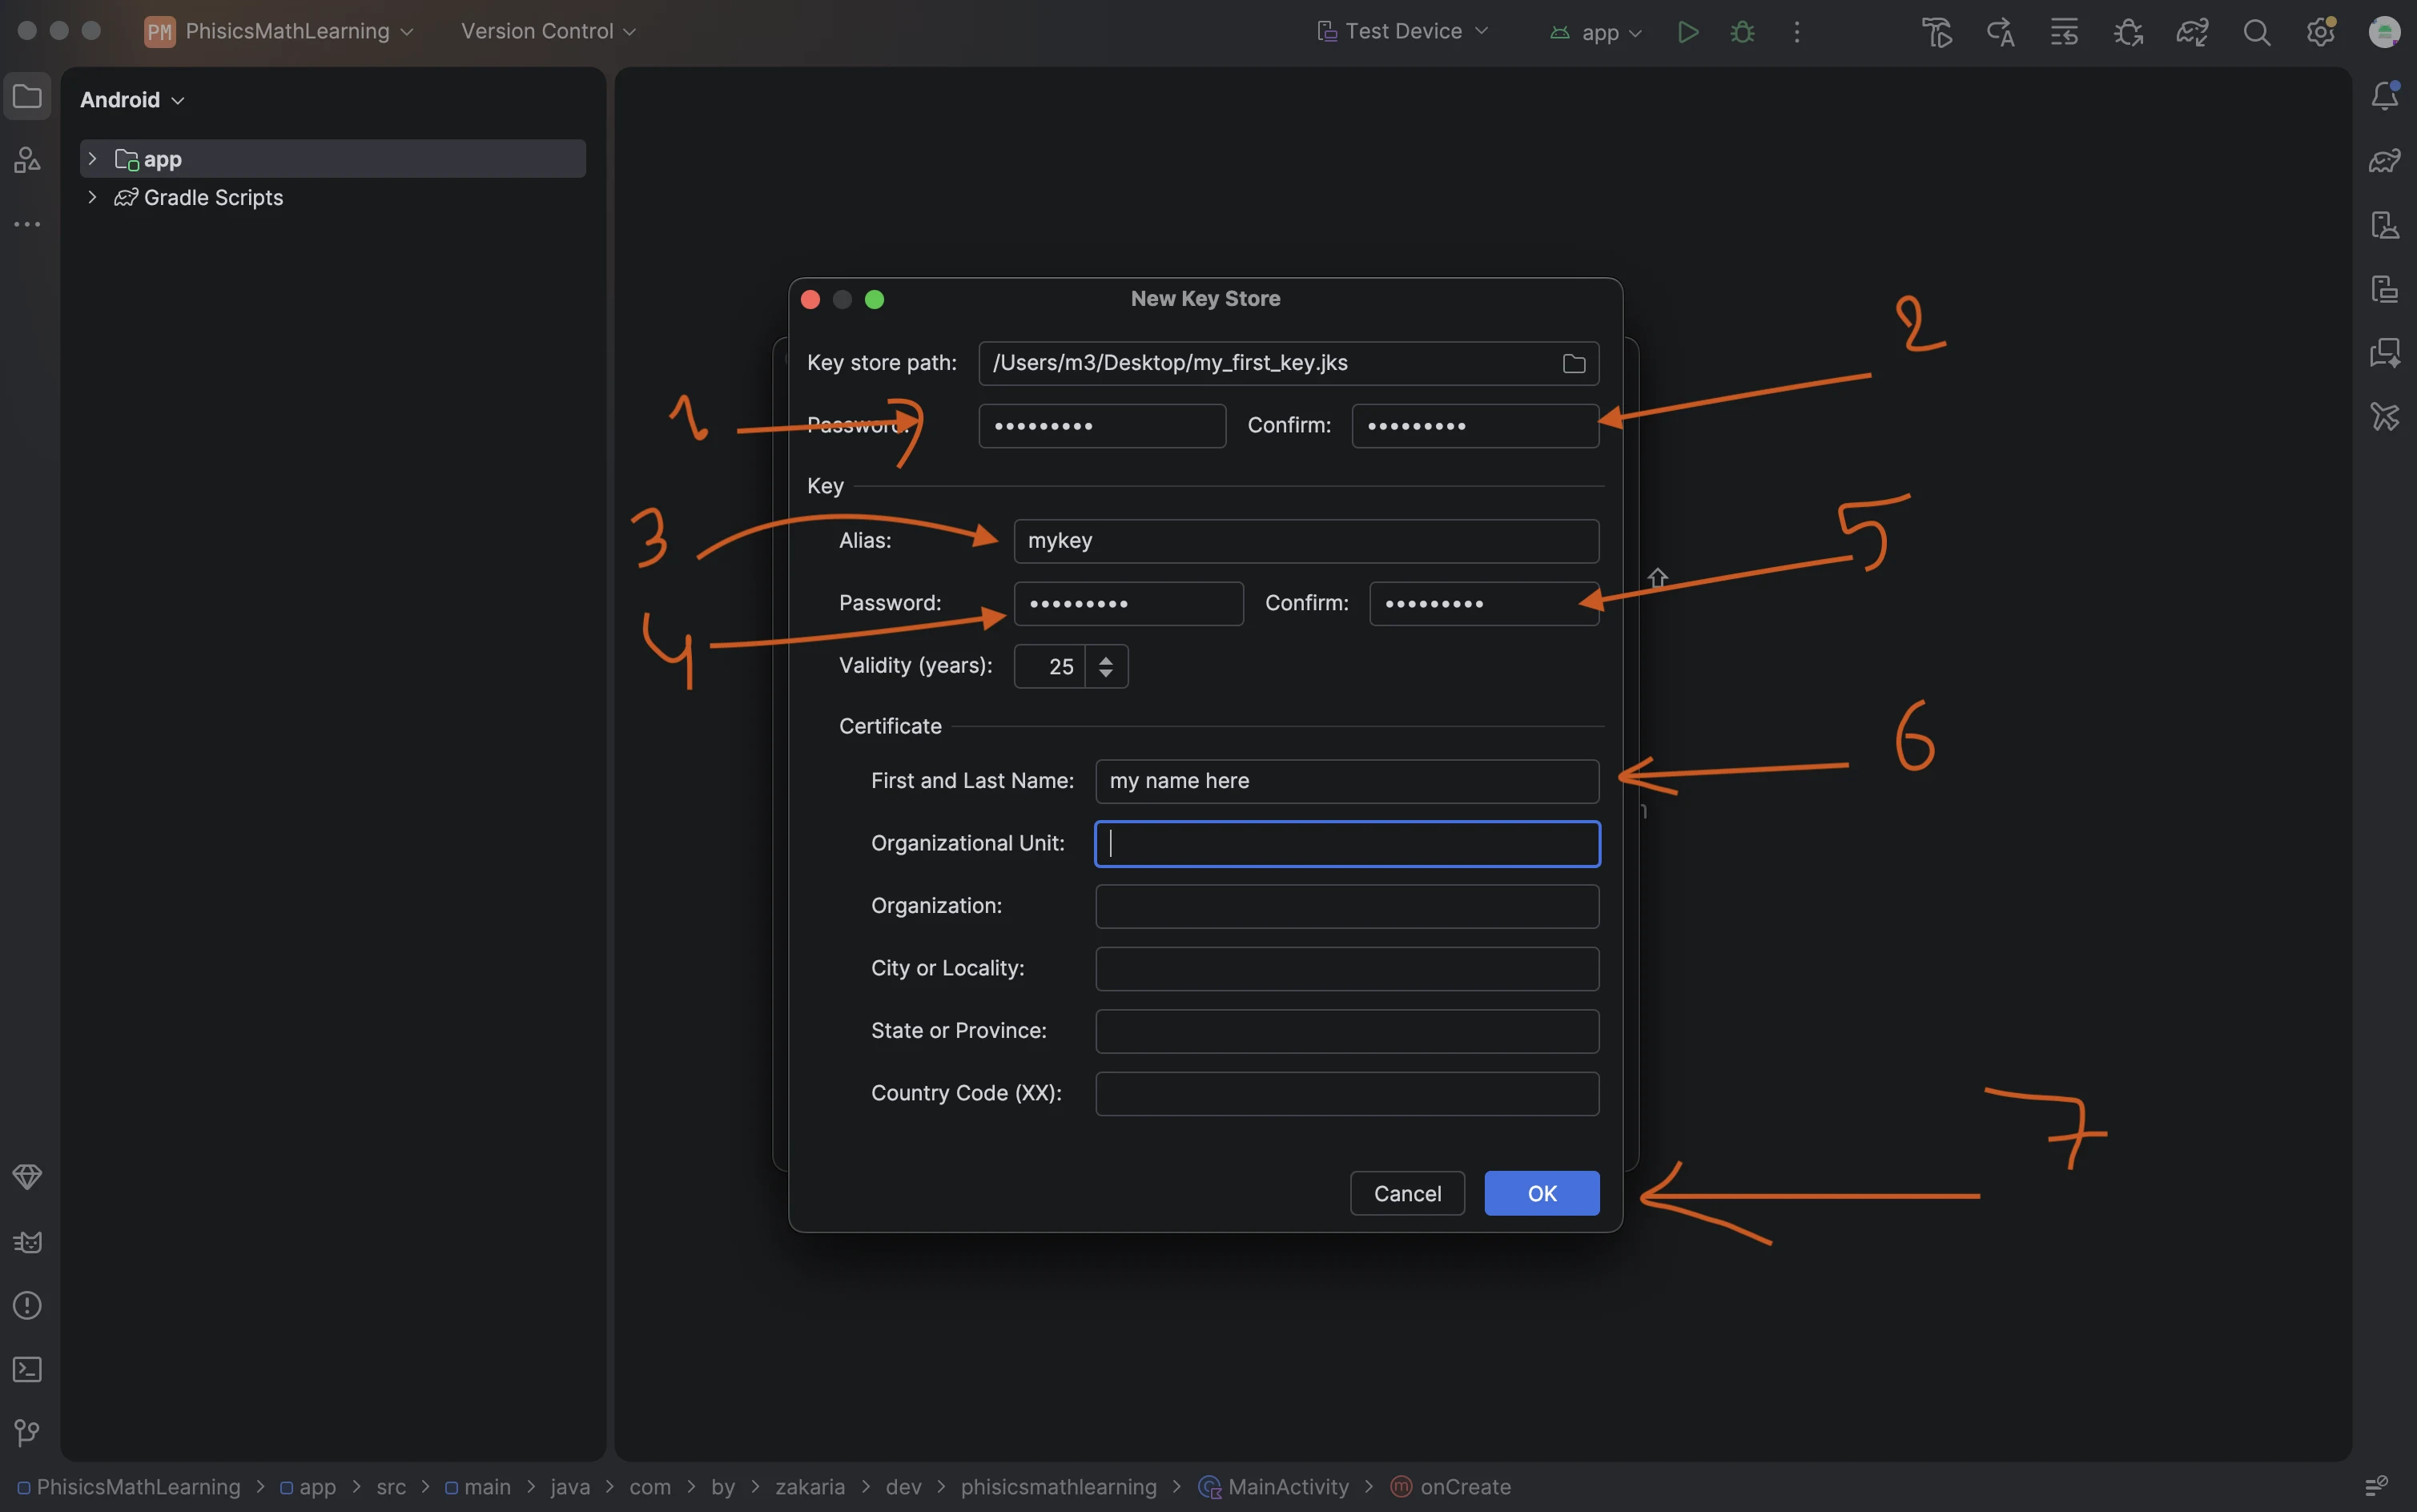
- Password: type a strong password for the keystore.
- Confirm: type the same password again.
- Alias: give your key a name, for example "mykey".
- Password (under Key): type a password for the key itself.
- Confirm: repeat the key password.
- First and Last Name: add your name or your company name. The other certificate fields (organization, city, country code) are optional, but it's a good idea to fill in at least the country code.
Leave "Validity (years)" at 25, which is the default and is more than enough for Google Play. When everything is filled in, click OK (7). Write your passwords and alias down somewhere safe, because you'll need them every time you release an update.
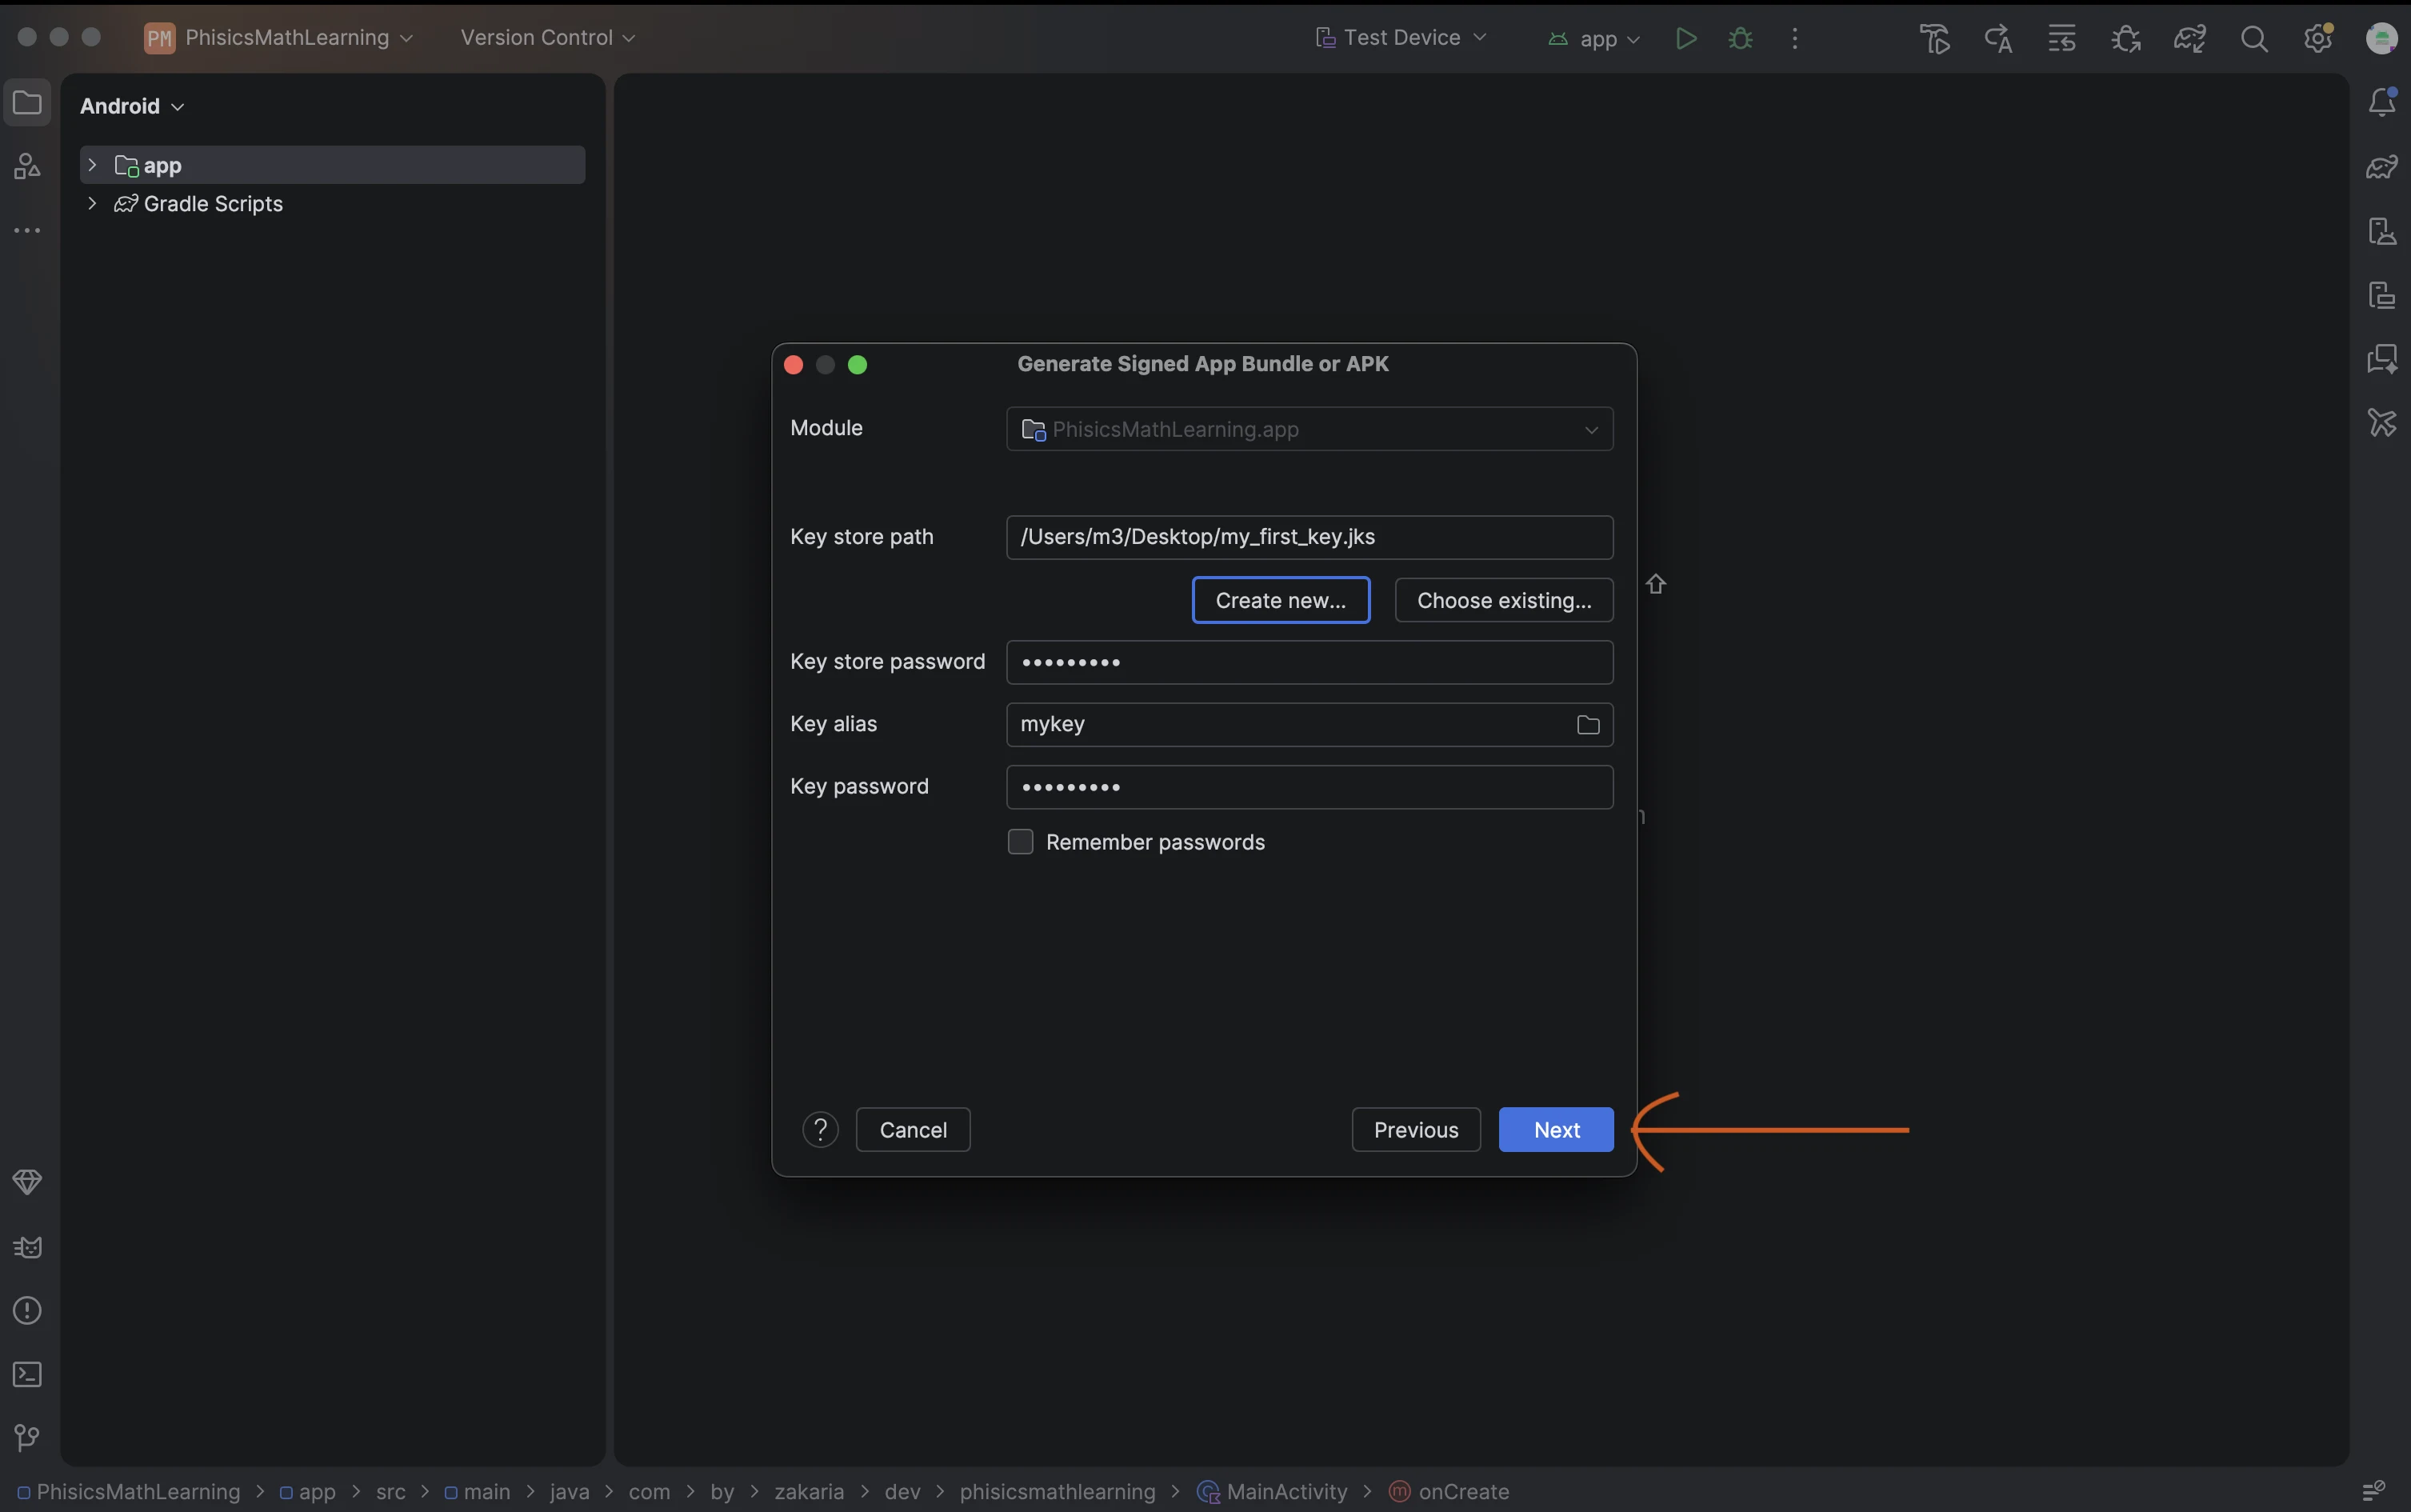
You're back in the main wizard, and Android Studio has filled in the key store path, key store password, key alias and key password for you. Take a second to check that everything looks right. You can tick "Remember passwords" if you're on your own computer and don't want to type them again next time. Then click Next.
This screen lets you choose the destination folder and the build variant. By default, the file is saved inside your project's app folder, which is fine. Under "Build Variants", select "release" (1). Don't use debug here: a debug build isn't meant for the Play Store and will be rejected. Then click Create (2).
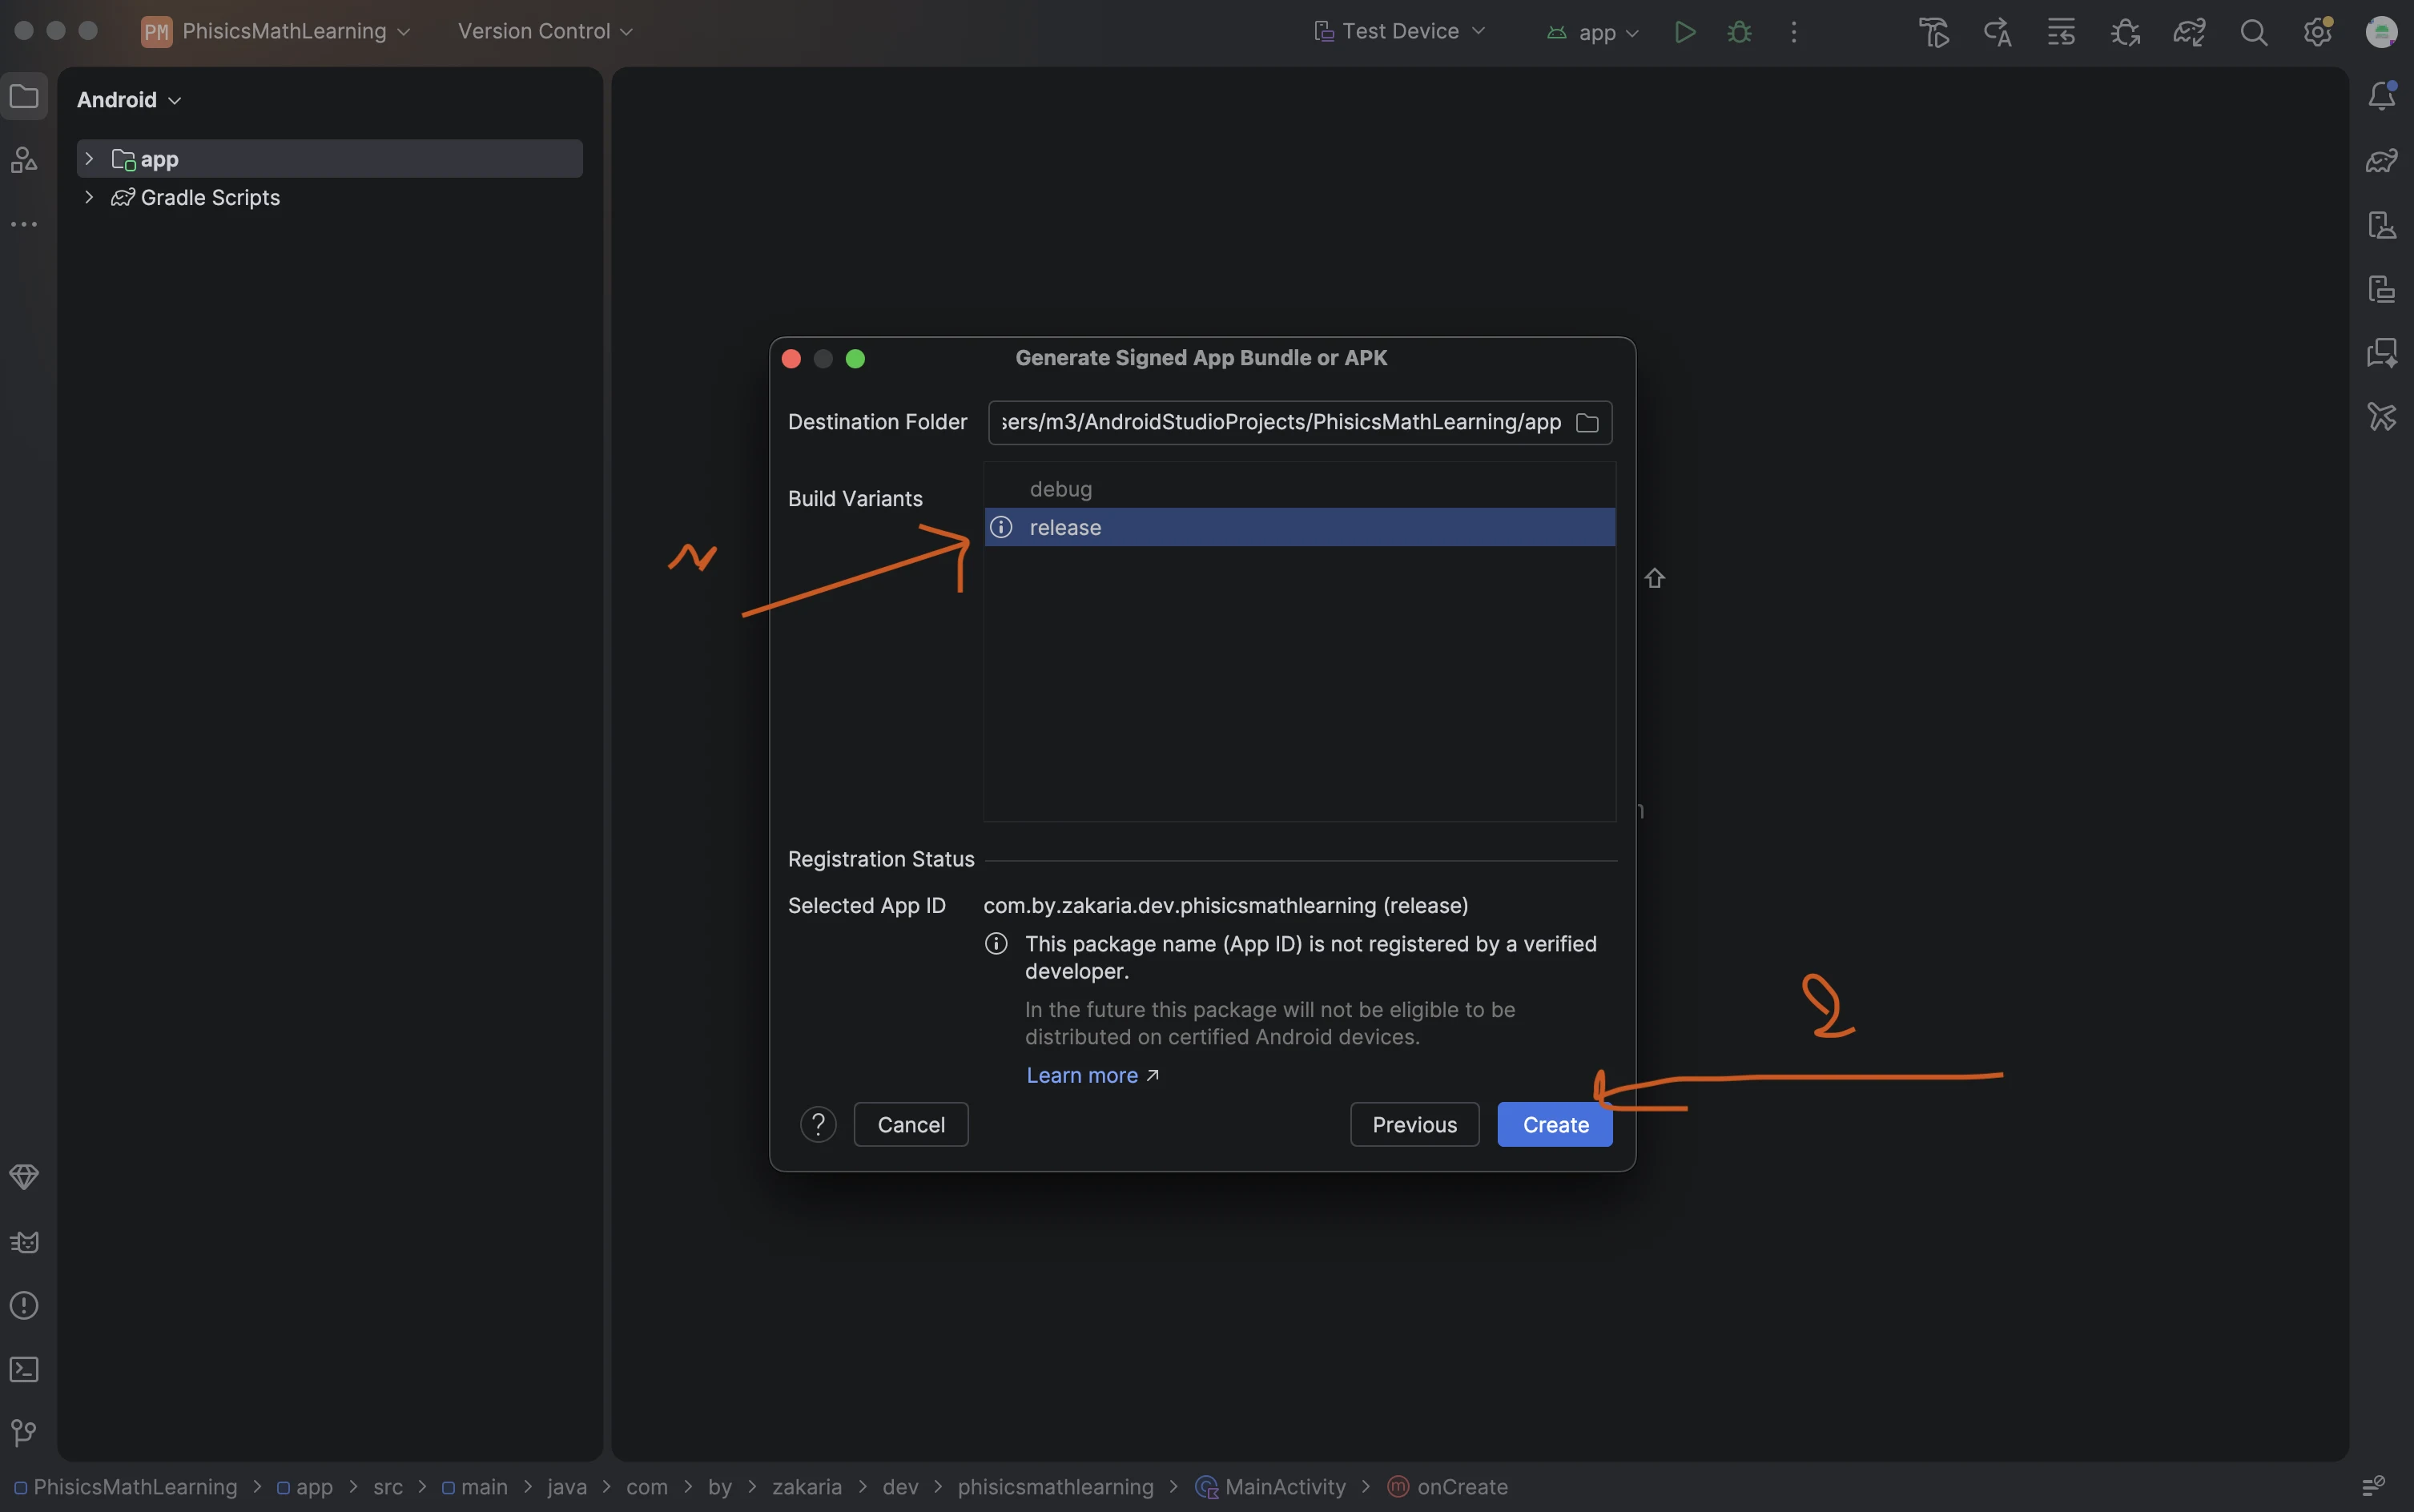
You may see a note saying your package name isn't registered by a verified developer yet. That doesn't stop the build, so you can go ahead.
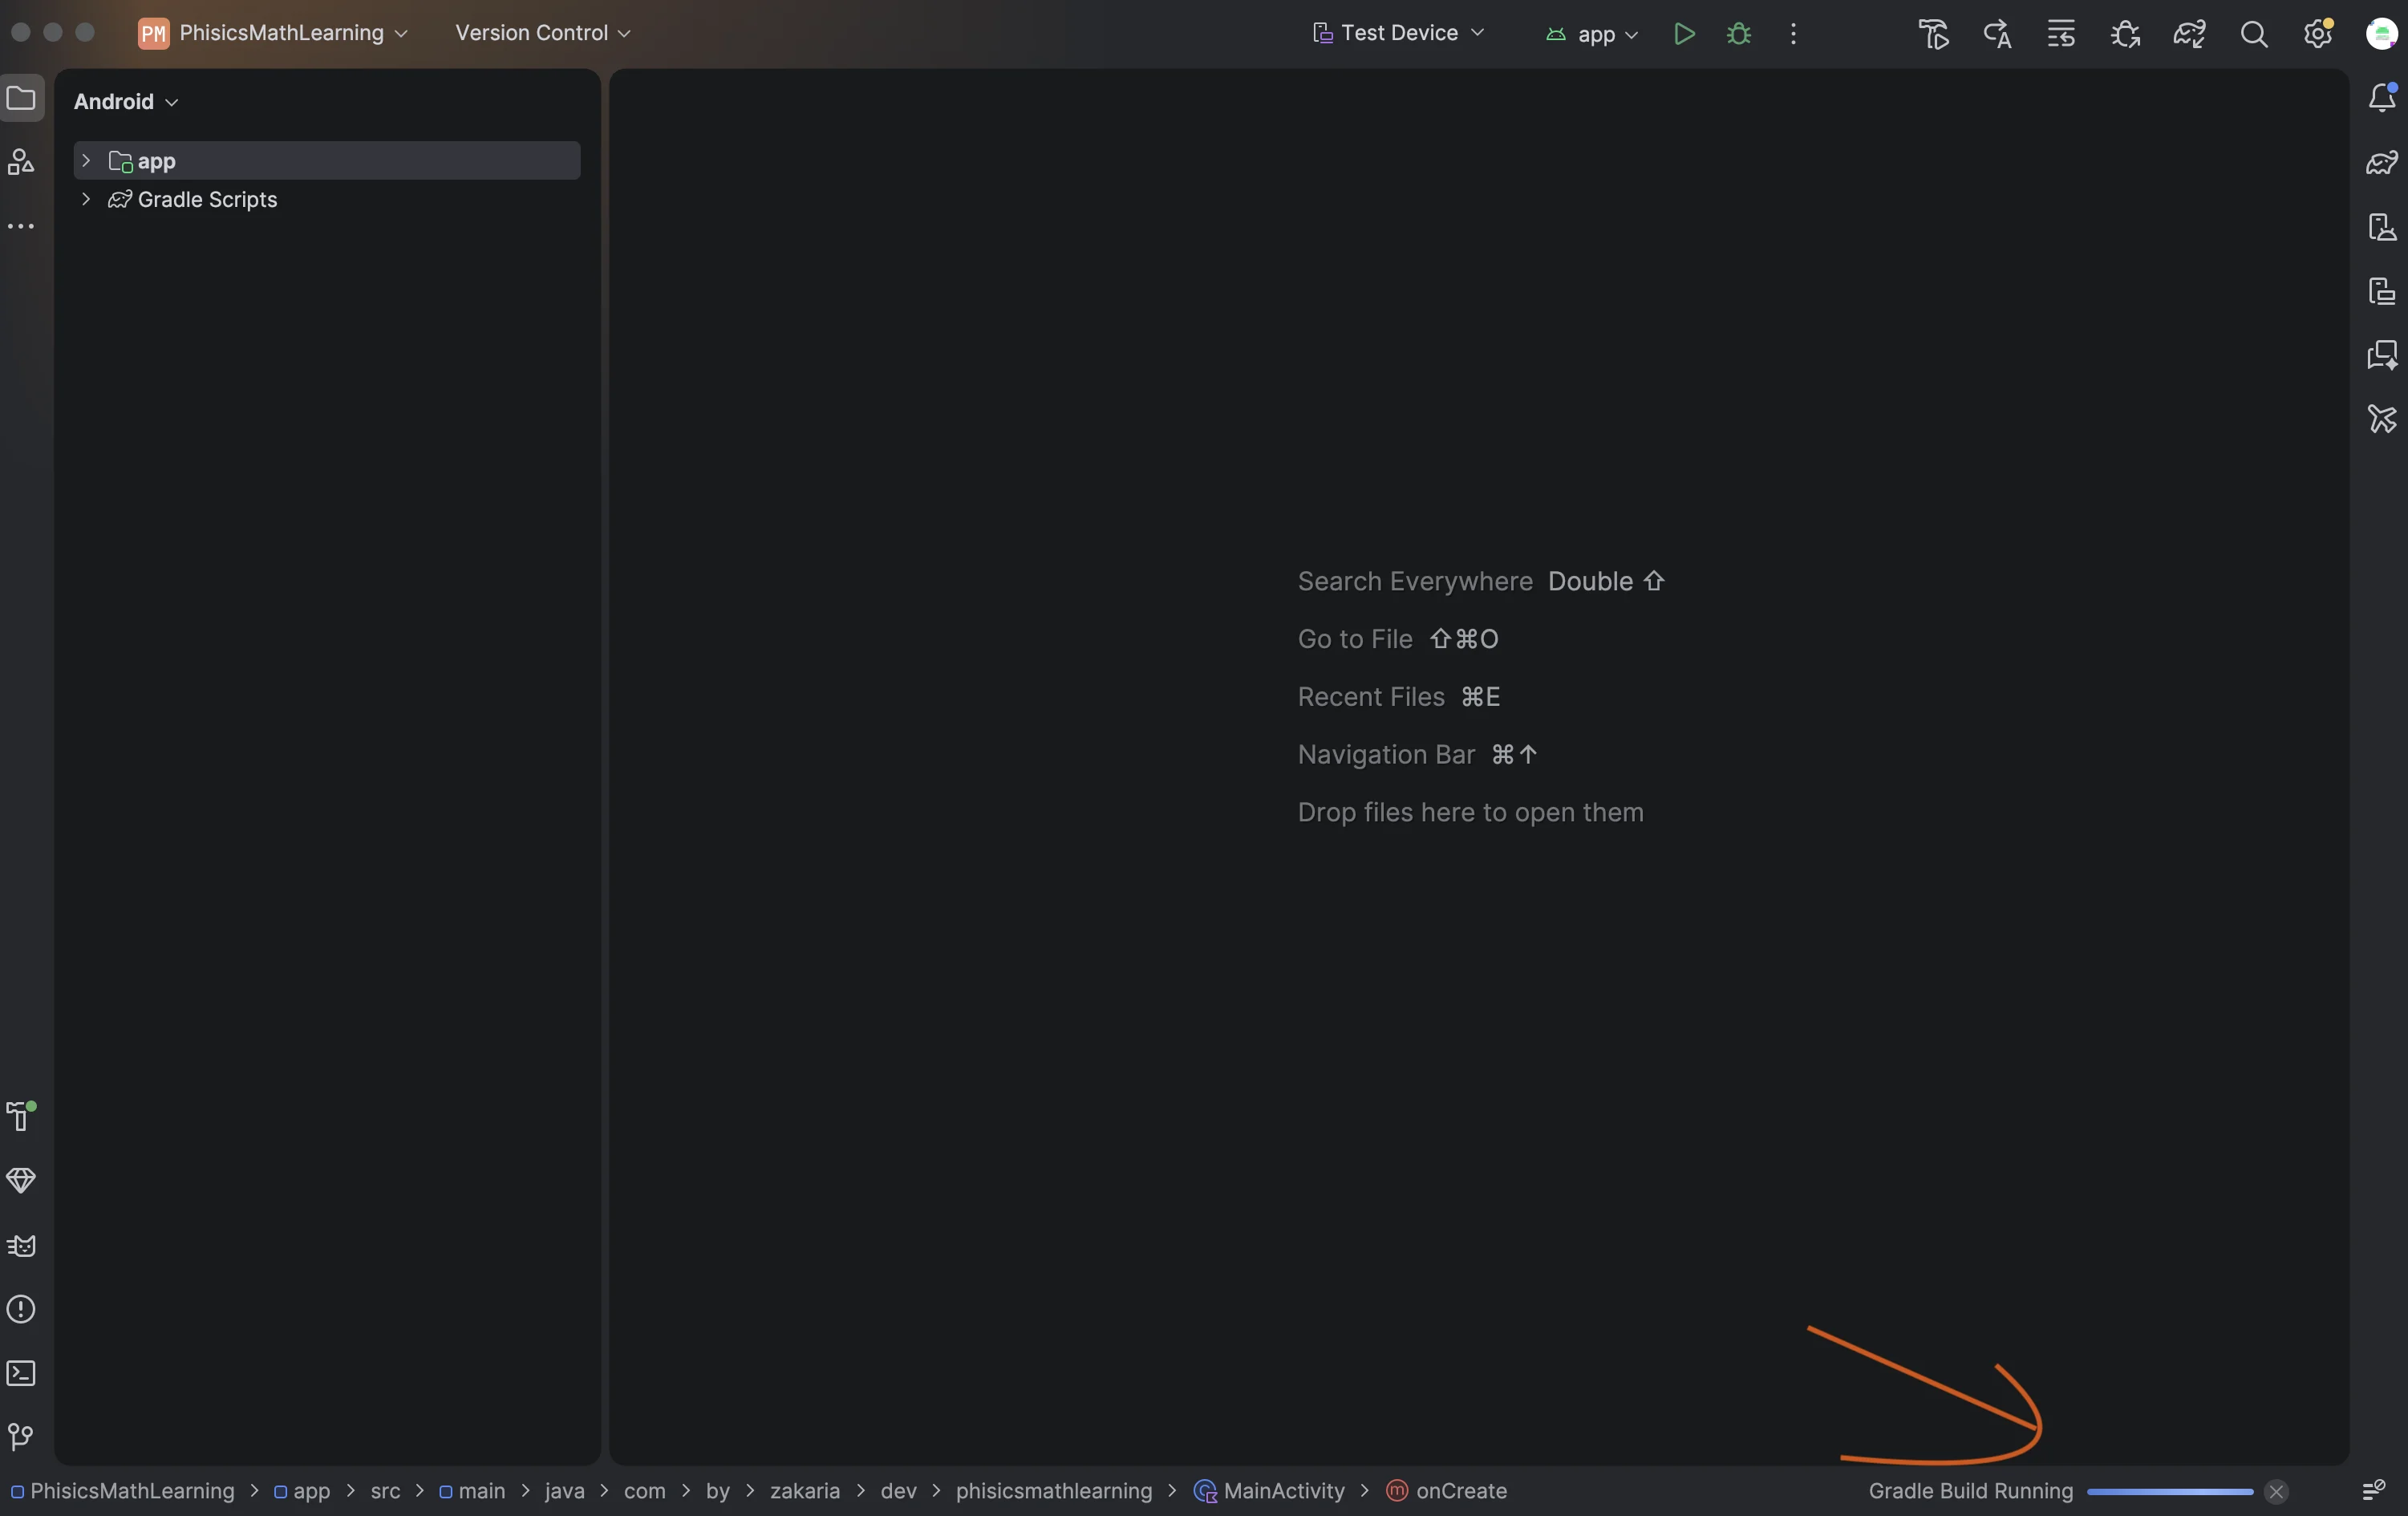
Android Studio now starts building your signed app bundle. You'll see "Gradle Build Running" with a progress bar in the bottom-right corner of the window. Depending on the size of your project and the speed of your computer, this can take anywhere from a few seconds to a couple of minutes. Let it finish.
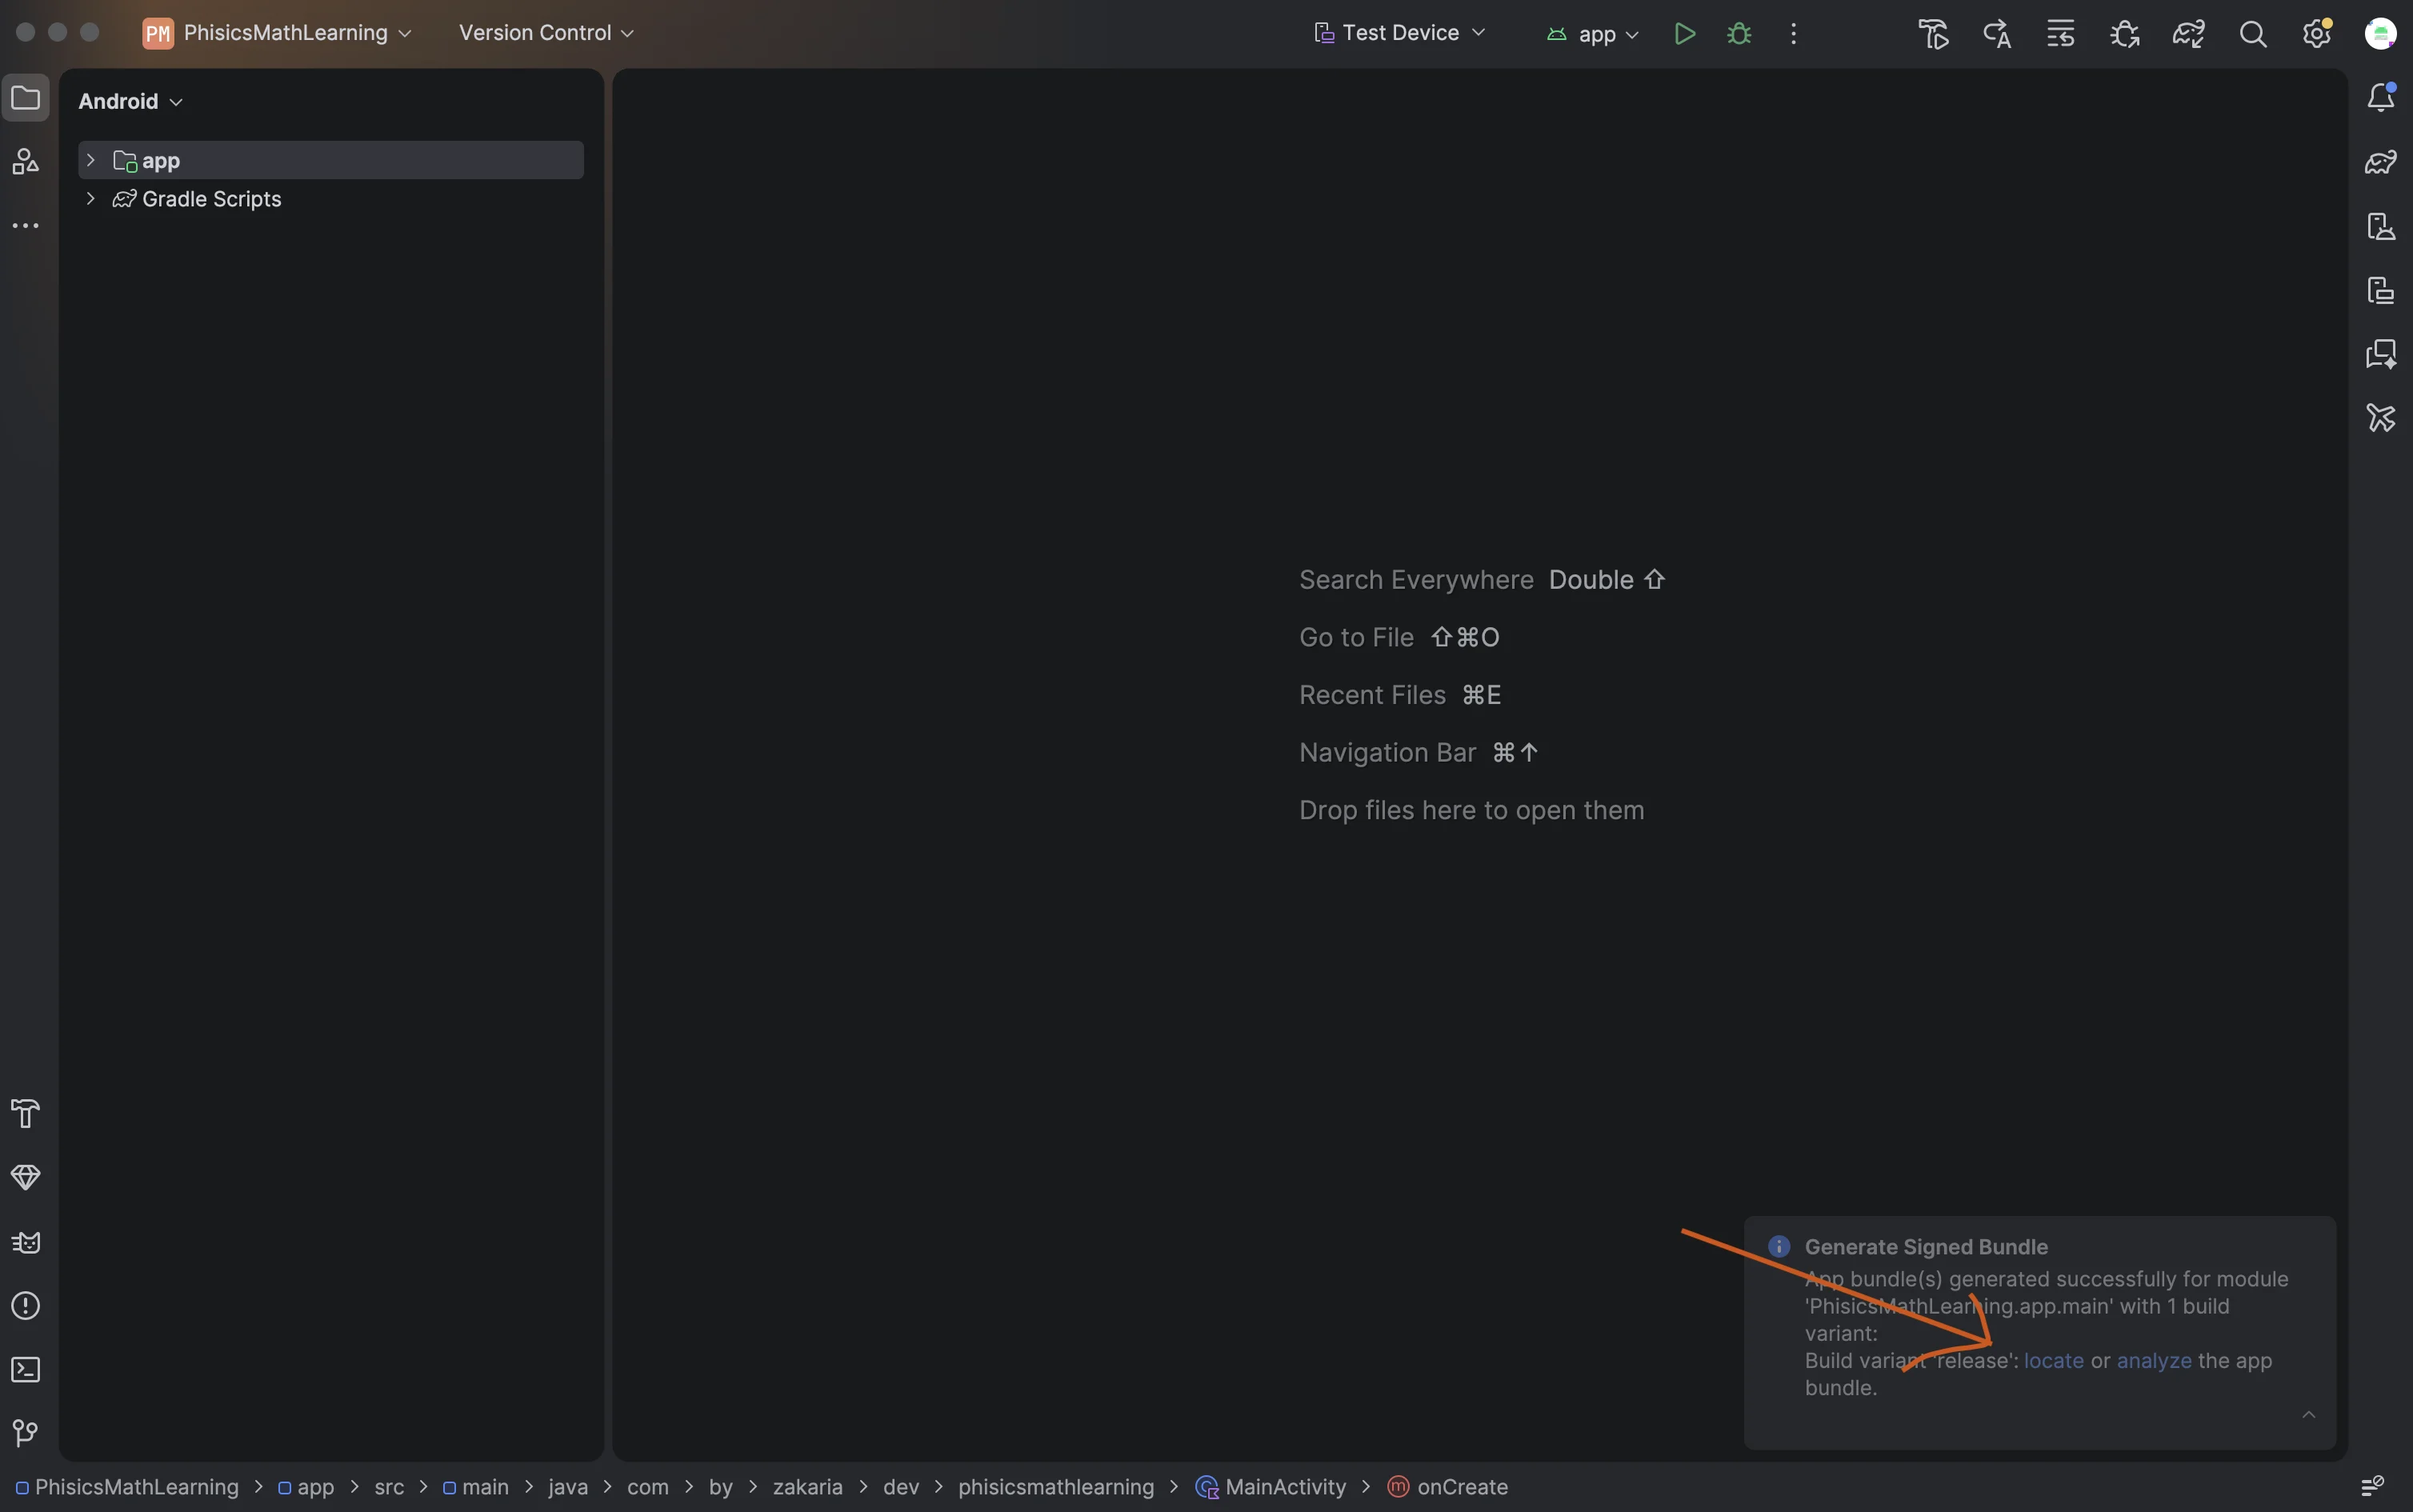
When the build is done, a "Generate Signed Bundle" notification pops up in the bottom-right corner. It confirms that the app bundle was generated successfully for the release variant. Click "locate" to open the folder that contains your AAB file. You can also click "analyze" if you want to look inside the bundle and check its size.
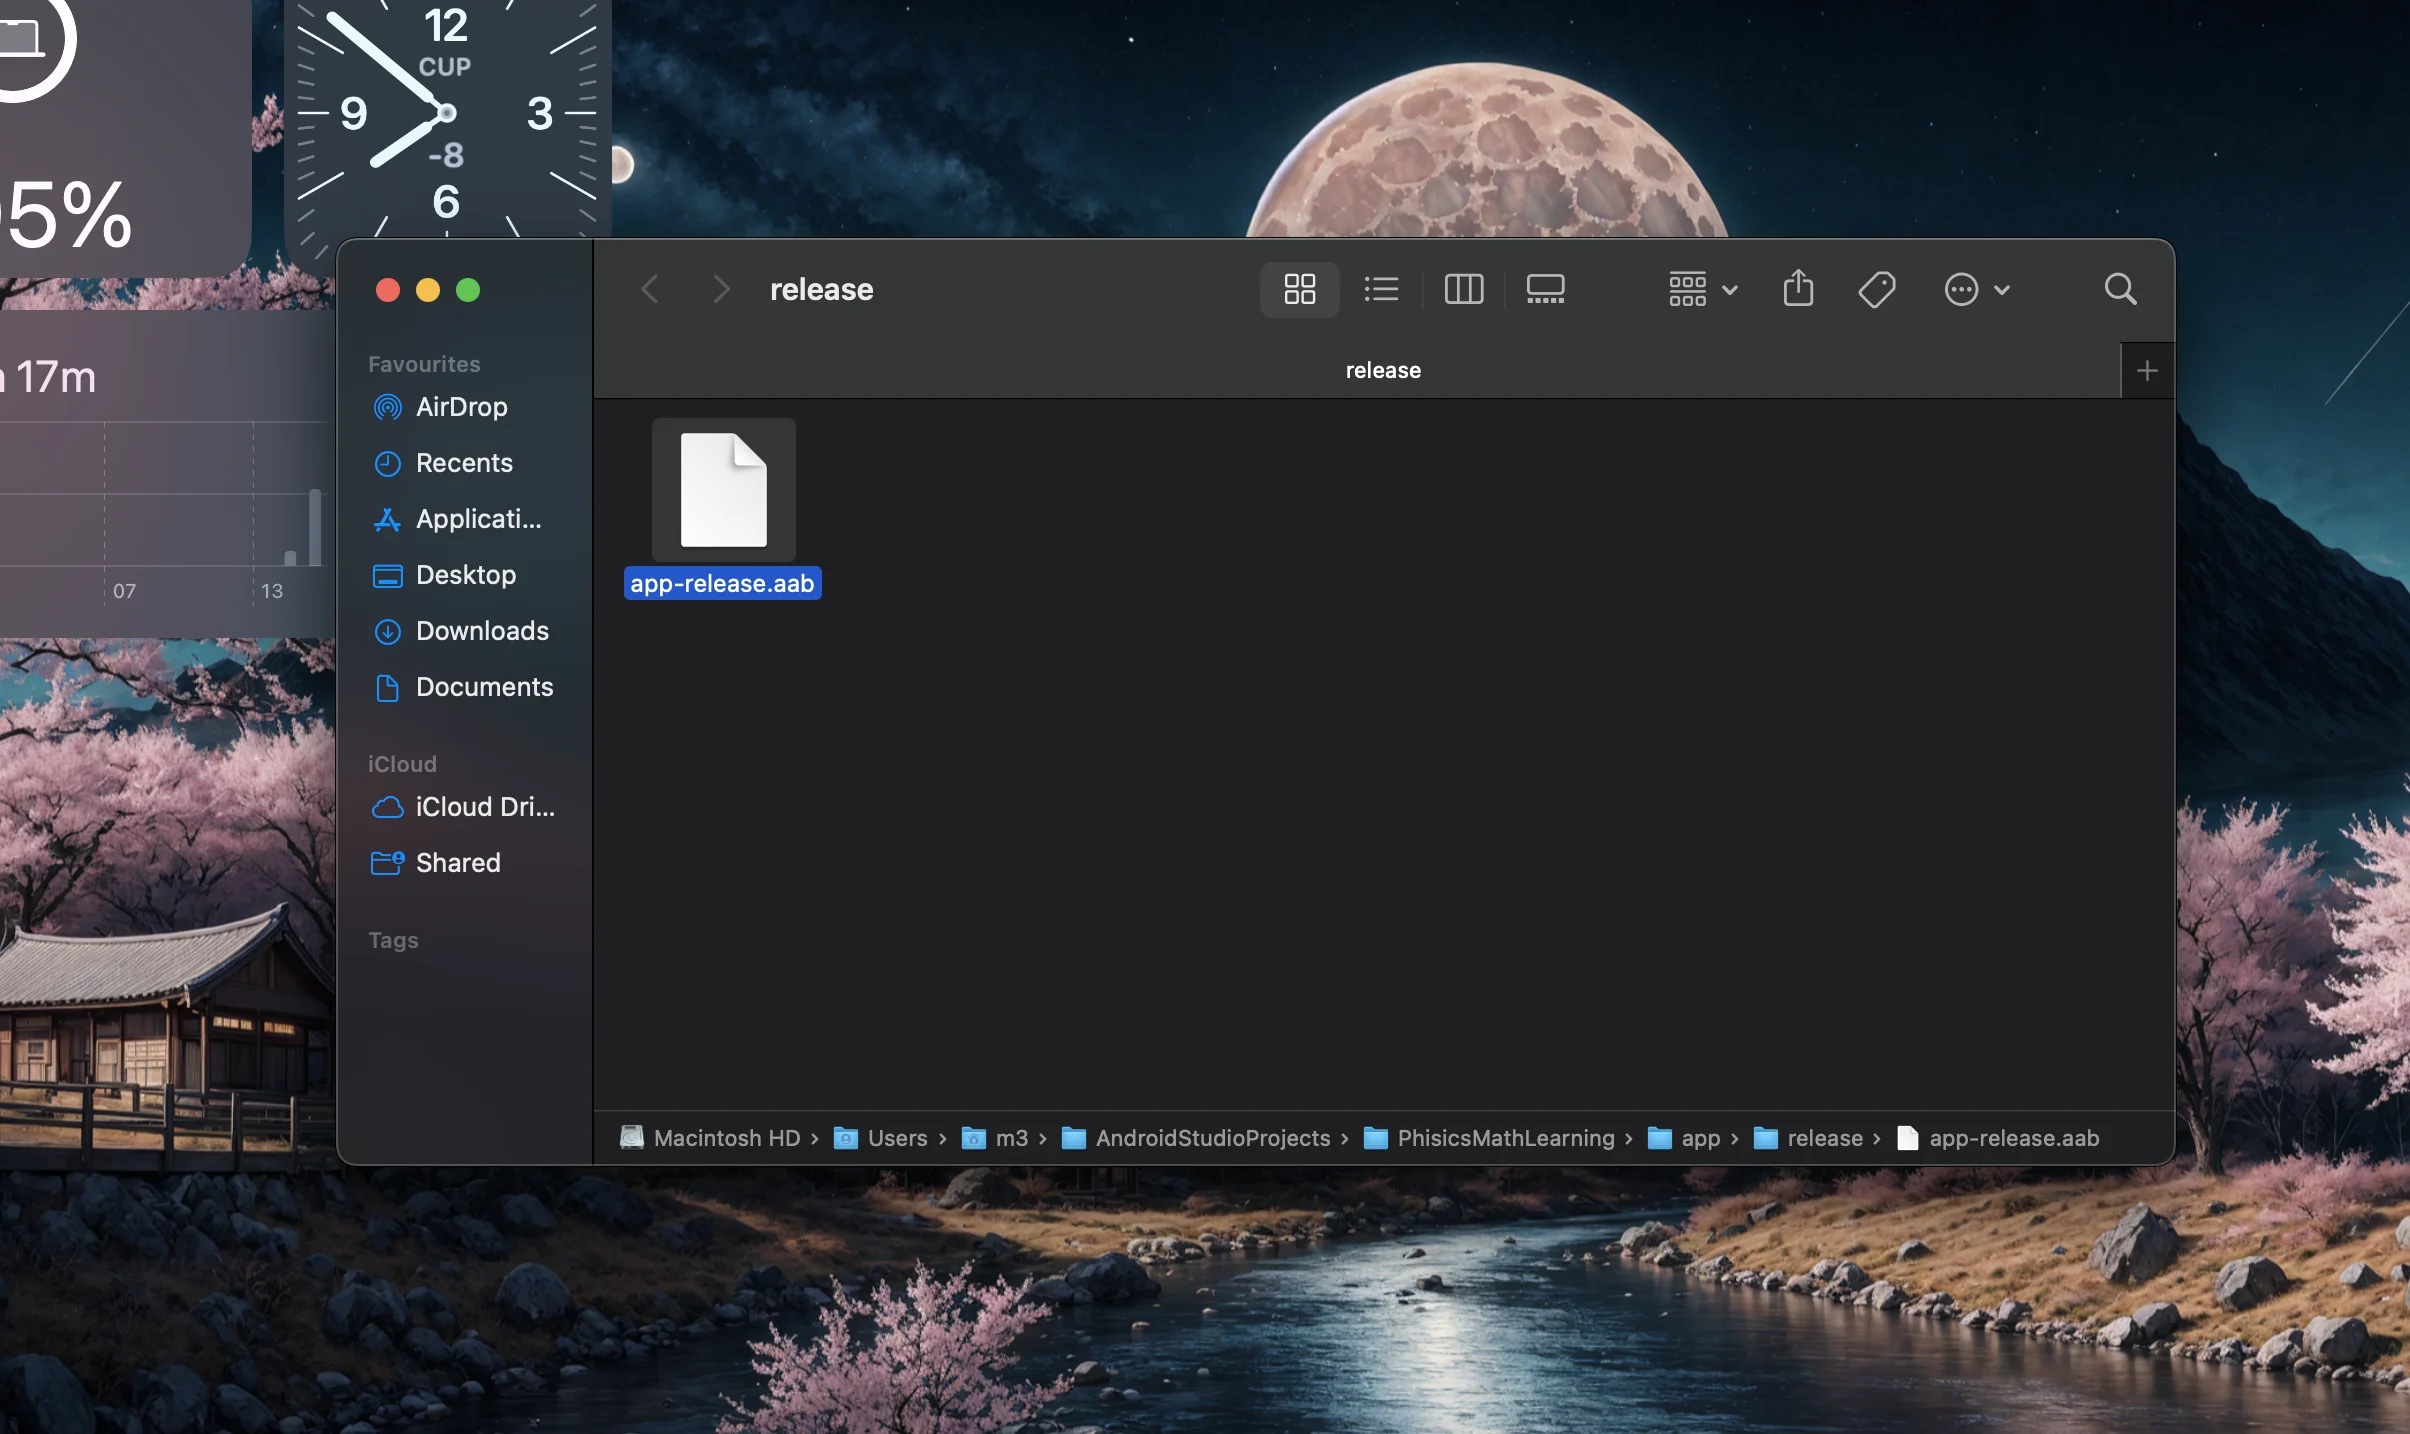
Clicking "locate" opens the release folder, and there it is: app-release.aab. You'll usually find it at: YourProject/app/release/app-release.aab This is the file you upload to Google Play Console. Go to your app in the Play Console, open a release track (for example Internal testing or Production), create a new release, and drag this file into the upload area.
CONCLUSION
That's all it takes to generate a signed AAB file in Android Studio. You opened the Build menu, chose Android App Bundle, created a keystore, selected the release build, and got your app-release.aab file ready for Google Play. The first time takes a few minutes because you have to set up the keystore. After that, you just pick your existing .jks file and build.
One last reminder: back up your keystore file and keep your passwords somewhere safe. For every future update of this app, you'll sign the bundle with the same key, so losing it can cause real trouble later.